Harness the power of the wind and create your own miniature wind turbine with this fun and educational DIY project! This simple experiment requires only readily available materials, making it accessible for all ages and skill levels. From repurposed toy motors to everyday craft supplies, you'll transform simple components into a working model demonstrating the fascinating principles of renewable energy. Get ready for an afternoon of engaging learning and creative construction.This hands-on activity will not only entertain but also provide a valuable understanding of how kinetic energy from wind can be converted into electricity. You'll learn about turbine design, blade optimization, and even measure the electrical current generated, all while experiencing the satisfaction of building something from scratch. Prepare to be amazed by the simplicity and effectiveness of this project – a perfect blend of science, engineering, and creative fun!
Read more: InnerVenue's Forever Battery: Revolutionizing Renewable Energy Storage
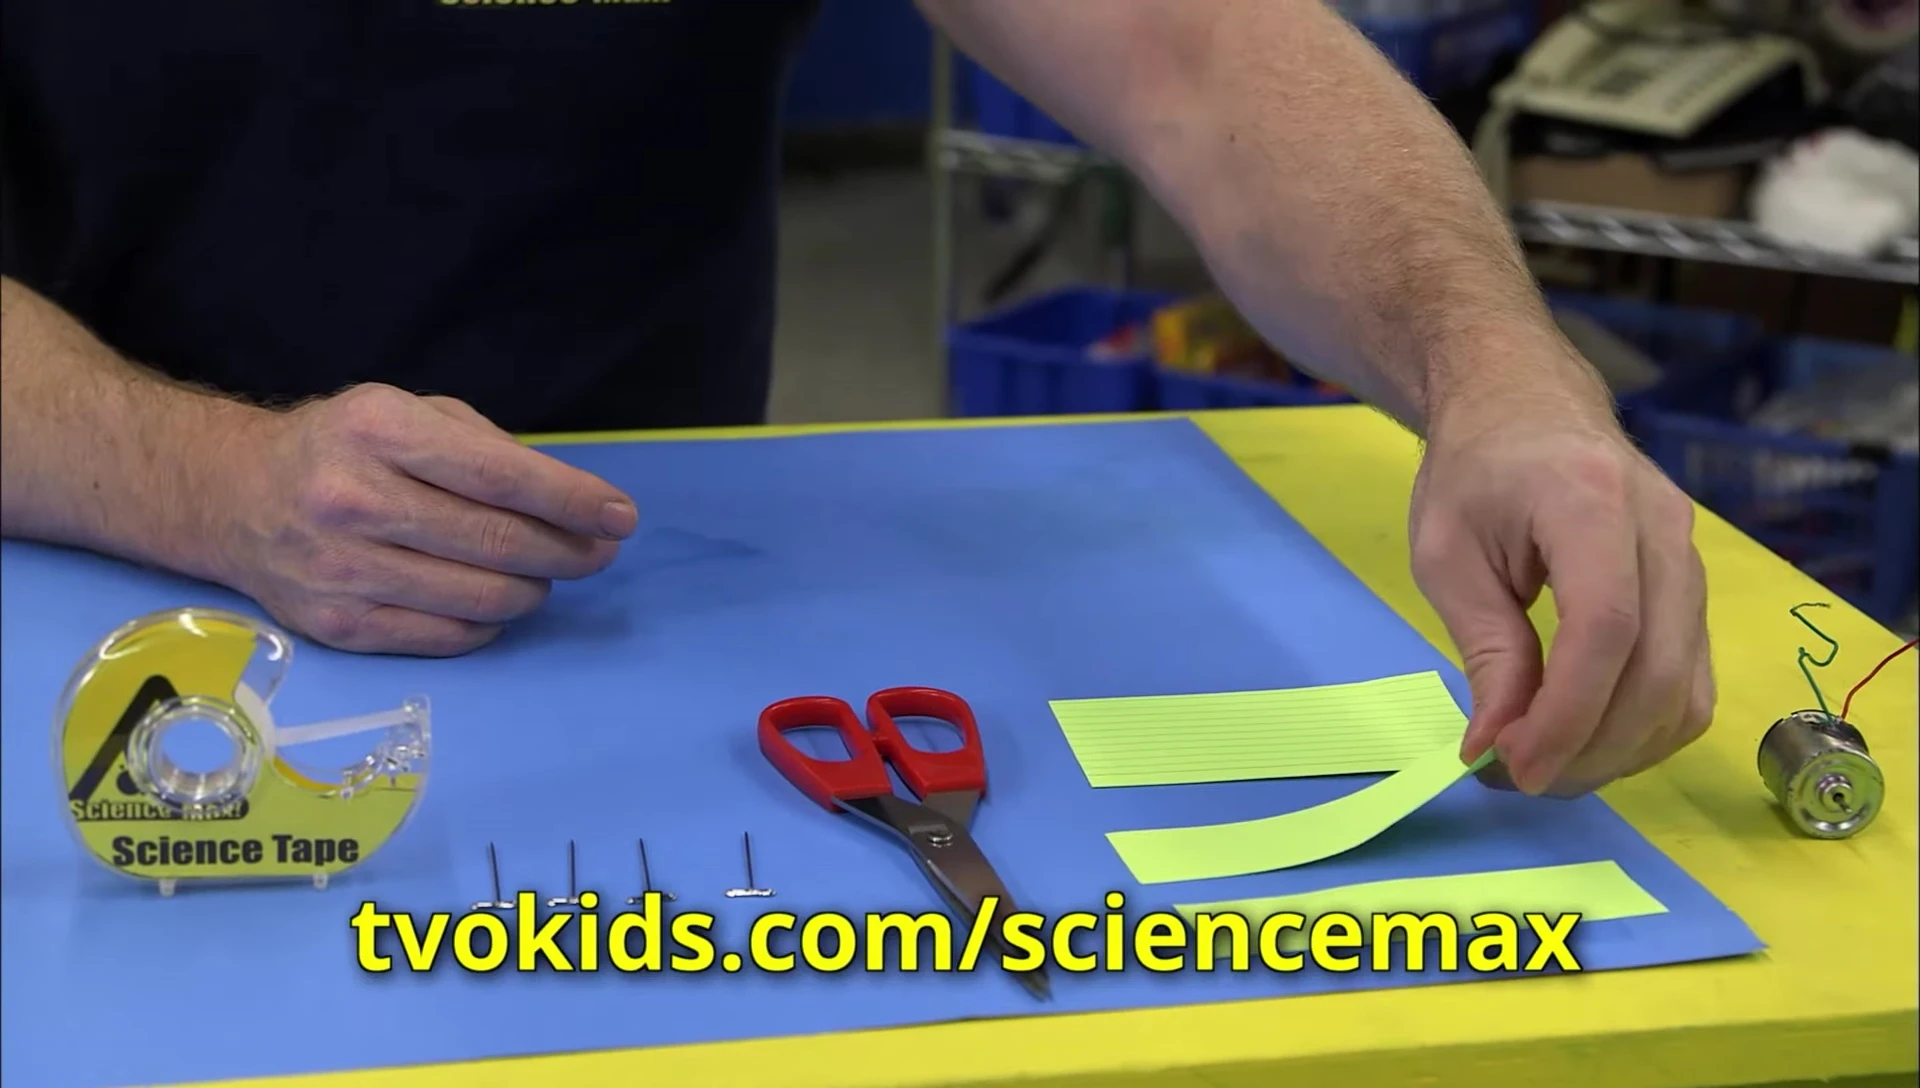
Gathering Your Supplies
Building your own wind turbine is a surprisingly simple project, perfect for a fun afternoon of learning and creating. To start, you'll need a few everyday items that are likely already in your home or easily obtainable. This makes it an accessible project for all ages and skill levels.
The core component is an electric motor, which can often be salvaged from broken toys. Ensure the motor itself is functional; other parts of the toy can be broken without impacting the project's success. The list of other materials you will need include: index cards or construction paper, scissors, push pins, tape, a cork, chopsticks, and modeling clay.
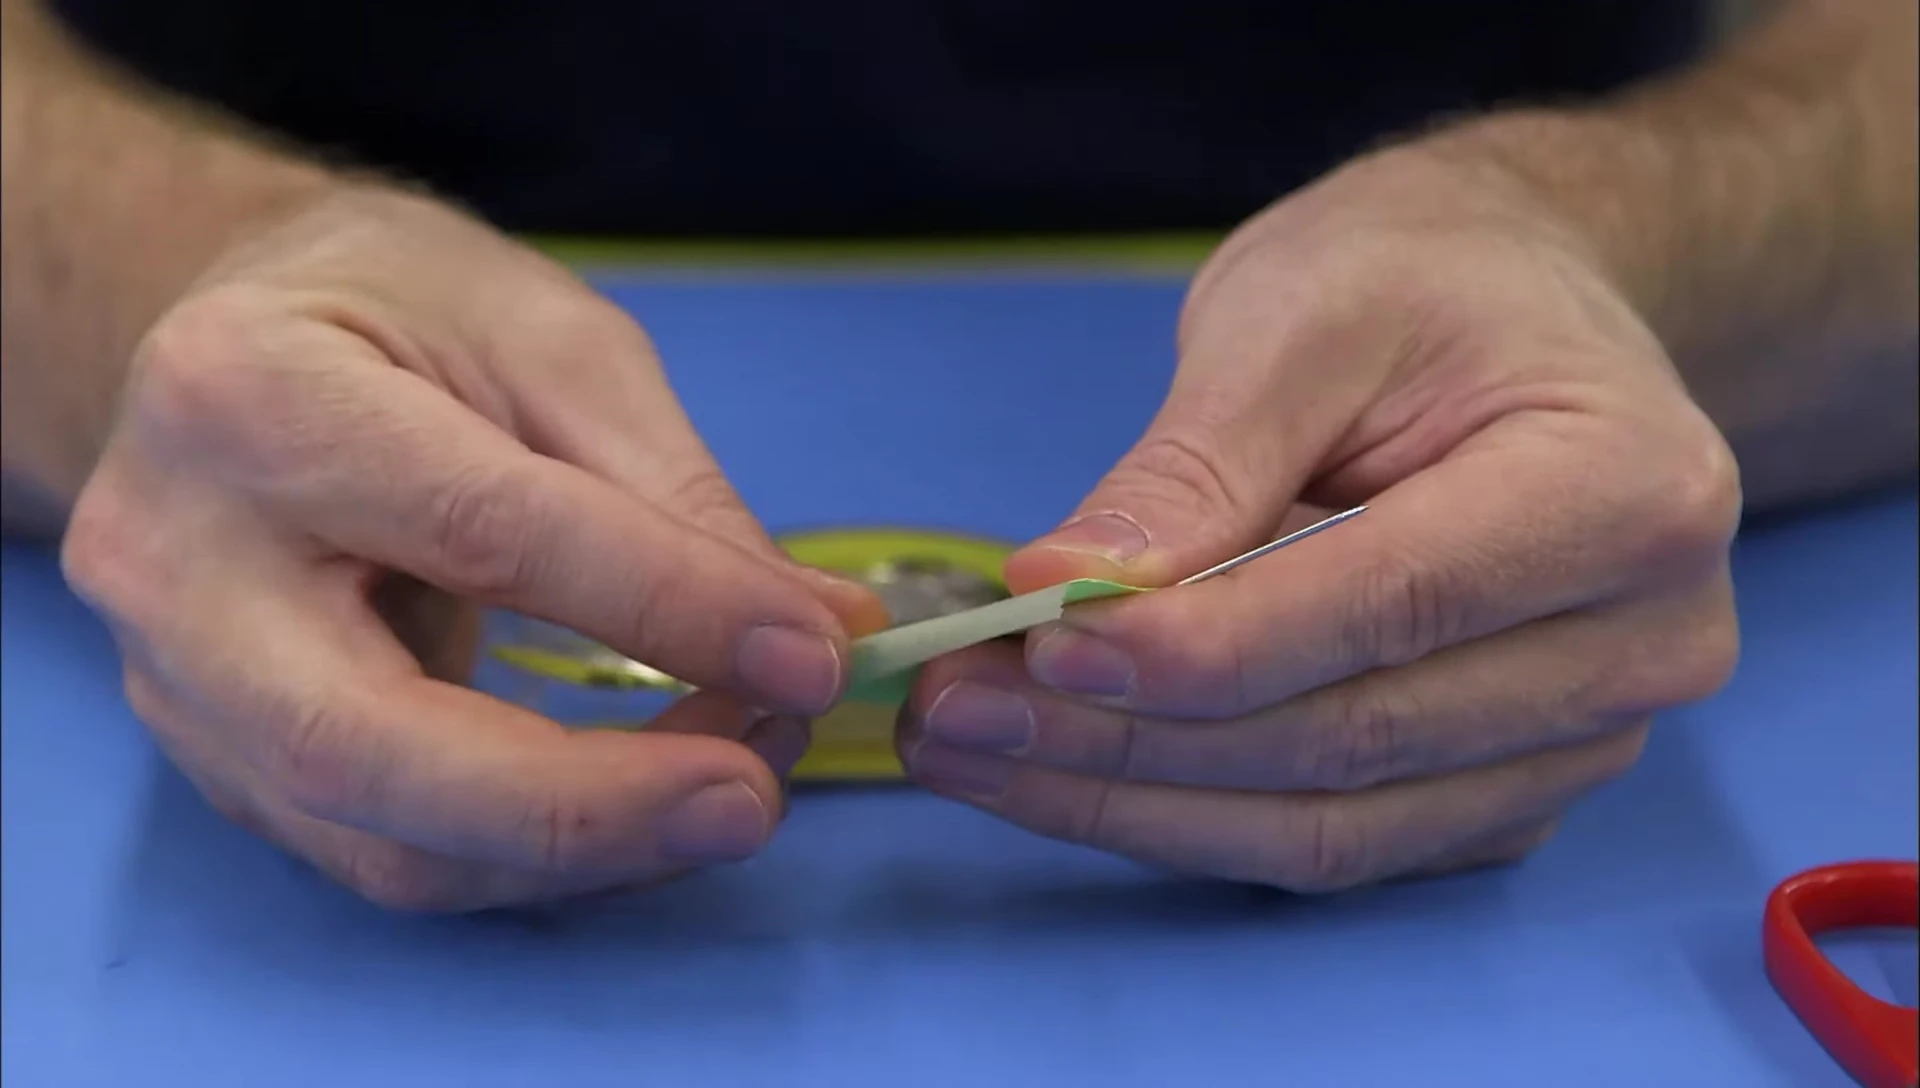
Constructing the Turbine Blades
Begin by cutting your index cards or construction paper into strips. Attach a pushpin to each strip, ensuring the pin protrudes slightly, which will form the base of the turbine blades. Secure the pin by folding the card and taping it securely to avoid any gaps.
Repeat this process to create multiple blades, depending on your desired fan size and wind-catching capabilities. Experiment with different blade counts and shapes to observe how this affects the turbine's performance.
Assembling the Wind Turbine
With your blades ready, embed the chopsticks into a lump of modeling clay to create a stable base. Securely fasten the craft sticks between the chopsticks using tape, creating a framework to support the motor and blades.
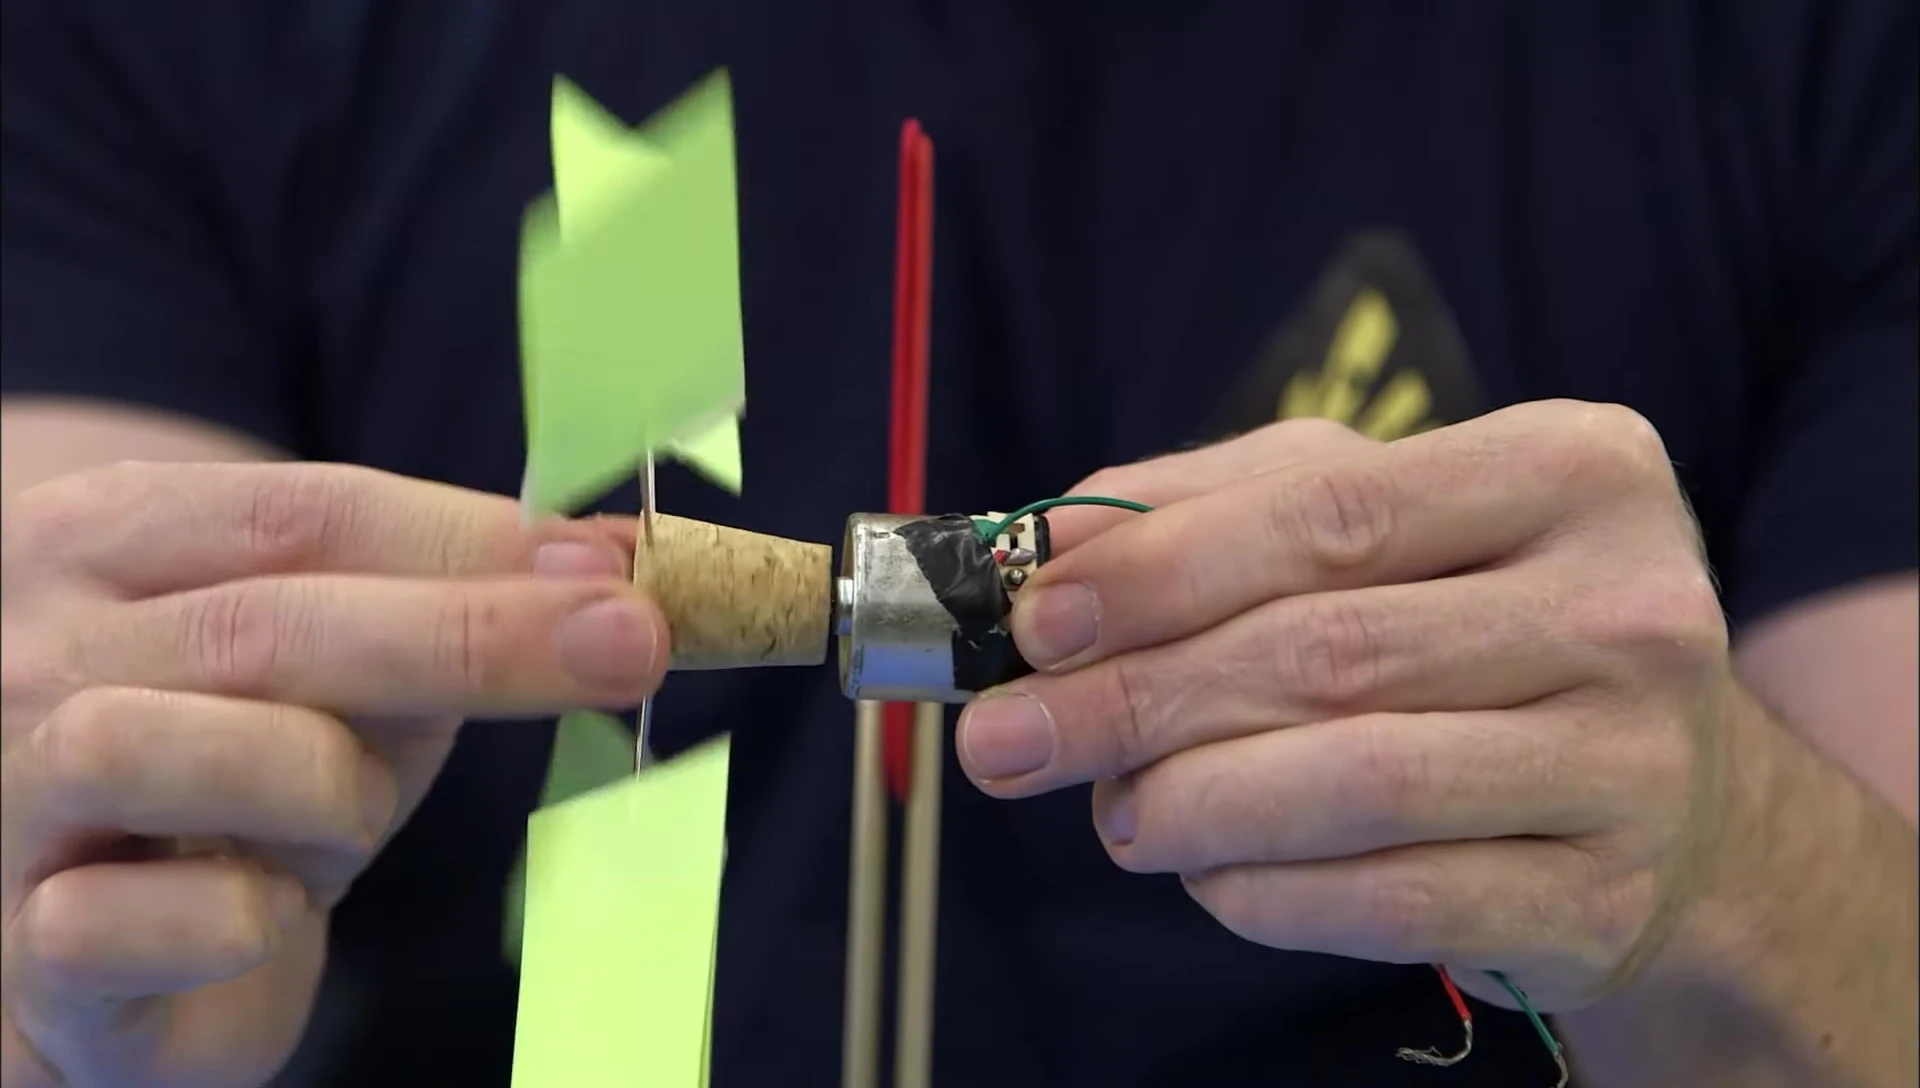
Carefully attach the cork to the end of the electric motor, then firmly wedge the motor between the craft sticks. Use more tape to ensure the motor is firmly held in place, creating a robust and functional wind turbine.
Testing and Observing Electricity Generation
To optimize your wind turbine's efficiency, adjust the blades to create a slight angle. This ensures that they effectively capture the wind and generate rotation. Observe how the blades spin when exposed to even a gentle breeze.

Using a multimeter, measure the electrical current generated by the spinning turbine. While the output is low—sufficient to power only a small LED—it demonstrates the fundamental principles of electricity generation through kinetic energy.
Conclusion
This simple project successfully demonstrates how wind energy can be harnessed to generate electricity. While the scale is small and the power output limited, it provides a valuable hands-on lesson in renewable energy and fundamental physics principles. The experiment highlights the process of converting kinetic energy (wind) into electrical energy.
The project is a great educational tool, illustrating complex scientific concepts in a fun and engaging way. It encourages experimentation and exploration, helping to spark curiosity about renewable energy sources and their potential.