This review assesses the value of a $18 four-wire battery internal resistance tester. We unpack the device, examining its build quality, ease of use, and overall performance. The tester, designed for both coin cells and 18650 batteries, arrives with essential components but reveals some initial assembly quirks. Our examination focuses on the practicality of the design, including the sliding probe mechanism, the battery clamping system, and the overall stability of the device during testing. We detail the necessary steps for conducting a test, including the required external equipment and the calculation of internal resistance.The review provides a hands-on perspective, highlighting both the strengths and weaknesses of this budget-friendly tool. We assess the accuracy of the results obtained, contrasting its functionality with its usability issues. Ultimately, we determine whether this tester justifies its low price point, considering its limitations and comparing it to other available options on the market. The findings will help potential buyers decide if it meets their needs for testing battery internal resistance.
Pros And Cons
- Measures internal resistance of various battery sizes (coin cells and 18650 cylindrical cells).
- Includes two sets of wires (thick for current, thin for sense measurement).
- Sliding probe allows for adjustment to accommodate different battery sizes.
- Uses a four-wire setup, minimizing errors from lead resistance.
- Connects to a multimeter or dedicated battery tester.
- Fiddly to use; difficult to clamp and secure small batteries like coin cells.
- Jig can tilt, lacking stability.
- Requires assembly (soldering wires and using a screwdriver).
- Tightening screws can become difficult to loosen.
- Not ideal for high-volume testing; slow process for multiple batteries.
Read more: OUKITEL P2001 PLUS Review: Best Budget Portable Power Station?
Unboxing and Initial Impressions
The package contained the main jig, two sets of wires (thick for current and thin for sensing), and surprisingly, a loose screw. The build quality seemed decent enough for its price point. The jig is designed to hold both coin cells and 18650 cylindrical batteries.

The included banana clips seemed sturdy and well-made. While the overall construction felt solid, there were some minor assembly issues that need addressing before the use.

One thumbscrew was very tight, requiring pliers to loosen. This initial experience hinted at some potential usability challenges.
Jig Design and Functionality
The jig features a sliding probe mechanism controlled by thumbscrews, allowing for adjustment to accommodate various battery sizes. While the sliding mechanism is convenient, its lack of a central guide or support caused tilting during use.

The contact points are spring-loaded and appear reliable. However, the lack of additional support structures for the sliding portion leads to instability and makes it challenging to secure the battery properly, especially coin cells.

The battery clamping mechanism isn't particularly user-friendly, requiring a bit of dexterity to clamp the battery securely without it shifting inside.

Internal Construction and Connections
The jig consists of three stacked fiberglass circuit boards, providing robust construction. Clear markings indicate positive and negative terminals for both voltage and current measurements.

The user needs to prepare their own wires by stripping and tinning the ends before connecting them to the terminals. A soldering iron is required for this step.

The connection points are well-defined, simplifying the wiring process. Each wire needs to be properly soldered to ensure good contact.
Testing Procedure and Results
To perform a test, a constant current source is needed (like a programmable power supply or a battery discharger) set to 1 amp. Voltage is measured with a multimeter with and without the current draw.
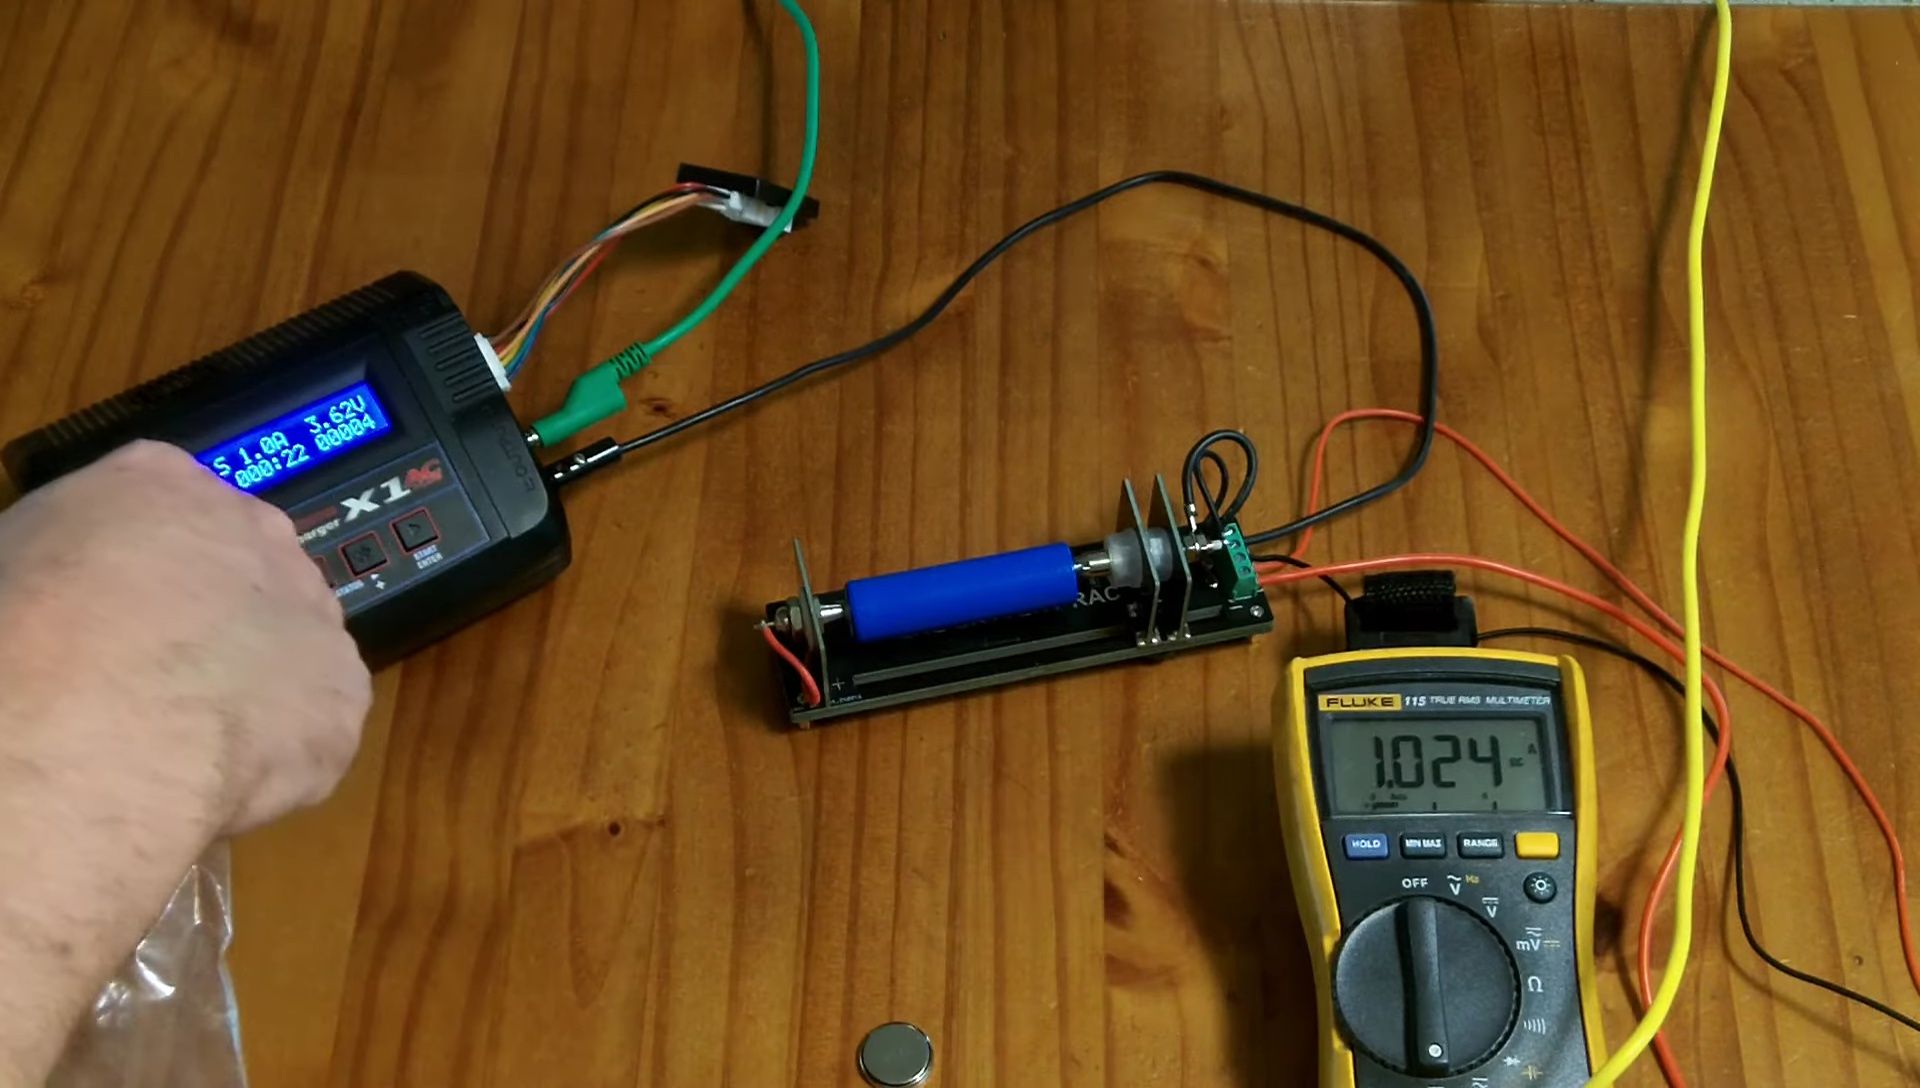
The internal resistance is calculated from the voltage drop under the load. I used a battery discharger, verifying its accuracy using a separate amp meter. This is crucial for obtaining accurate results.

The test revealed the internal resistance of a tested 18650 battery to be approximately between 54-65 milliohms.

Overall Assessment and Conclusion
This 4-wire battery internal resistance tester offers good value for its price. It successfully performs its intended function but suffers from usability challenges.

The fiddly clamping mechanism, especially for coin cells, and the lack of stability in the sliding probe detracts from the overall user experience. The necessity of some minor pre-assembly is also a minor inconvenience.

While functional, design improvements such as a spring-loaded mechanism and a more robust support structure for the sliding probe would greatly enhance usability and efficiency. It's a decent tool but better alternatives exist for high-volume testing.