This review dives into the Bluetti Charger 1, a DC-DC charger designed to dramatically accelerate charging times for Bluetti power stations. Unlike standard 12V cigarette lighter chargers limited to 100W, the Charger 1 boasts a 560W charging capacity, offering a significant boost for users on the go. This review details a hands-on installation and testing experience, showcasing the Charger 1's capabilities in a real-world scenario. We'll explore the installation process, from connecting the MC4 adapters to the Bluetti AC200P power station to routing cables and securing the connections within a vehicle's electrical system.The testing phase focuses on comparing charging speeds with and without the Charger 1, highlighting its effectiveness during a 2-hour drive. We'll also assess the Charger 1's performance alongside solar panel charging, demonstrating its value as a reliable supplemental or alternative charging method, especially in less-than-ideal weather conditions. Ultimately, this review aims to provide a comprehensive assessment of the Bluetti Charger 1's performance and practicality for users seeking faster and more efficient charging for their power stations.
Pros And Cons
- Upgrades charging ability from 100W to 560W.
- Allows for faster charging of Bluetti devices and other power banks while driving.
- All-in-one power station with battery, inverter, and solar charger.
- Can be charged via power plug, cigarette lighter charger, and solar panels.
- Compatible with third-party solar panels.
- Solar charging is unreliable in the UK.
Read more: OUKITEL P2001 PLUS Review: Best Budget Portable Power Station?
Bluetti Charger 1: A DC-DC Charging Solution
The Bluetti Charger 1 is a DC-DC charger, also known as an alternator charger, designed to significantly boost the charging speed of Bluetti power stations and other power banks. Unlike the standard 12V cigarette lighter charger limited to 100W, the Charger 1 allows for charging speeds up to 560W. This translates to a considerable charging advantage, especially during long drives.
In my testing, charging my 2000Wh power bank increased from a meager 5% in an hour using the 100W charger to a substantial 25-30% with the Bluetti Charger 1. This considerable improvement in charging efficiency makes the Charger 1 a valuable accessory for anyone who frequently utilizes their power station on the go.
My Bluetti AC200P Power Station
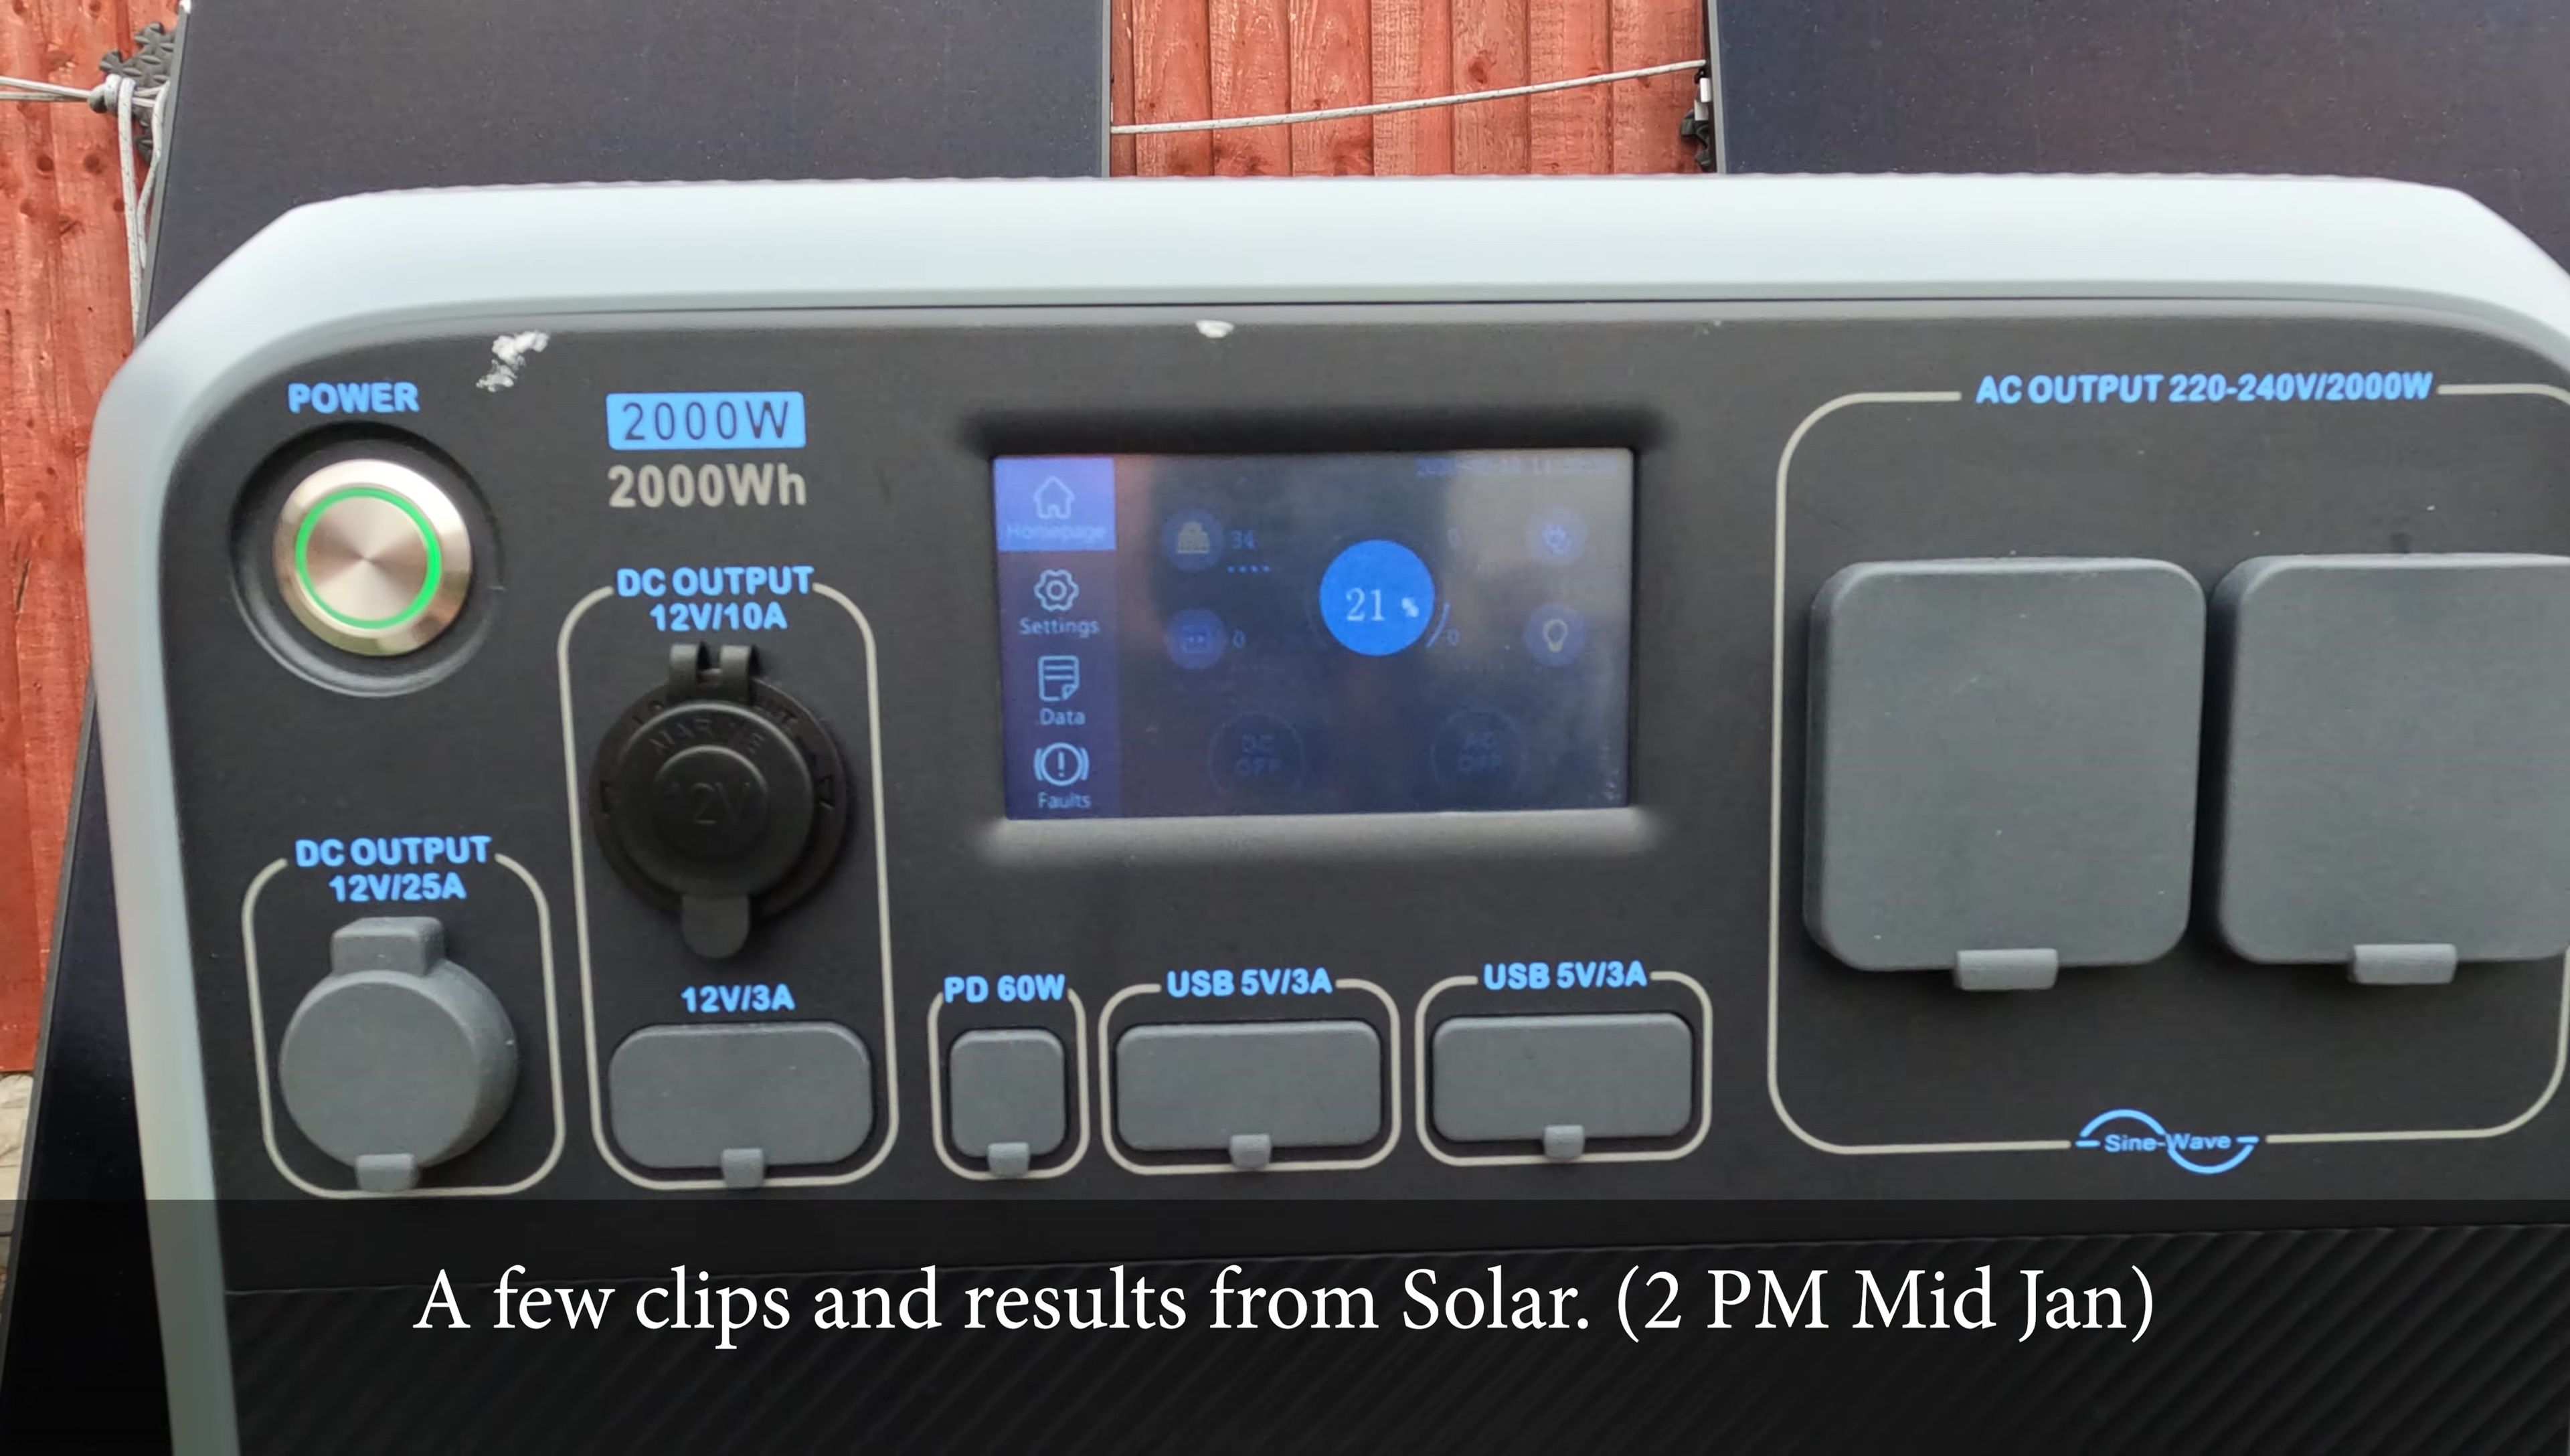
I purchased the Bluetti AC200P power station for £729. It's an all-in-one unit, integrating a battery, inverter, and solar charger. This versatility allows for charging via various methods: AC power at home, a 12V cigarette lighter, or solar panels. The AC200P's compatibility with third-party solar panels was a key factor in my purchase decision.
I use City Plumbing 60W solar panels (two for 460W total). While solar is convenient, its reliability in the UK is questionable. Therefore, I use the Bluetti Charger 1 to supplement solar charging, especially during lengthy periods of driving.
Installation Process: Connecting the Charger 1
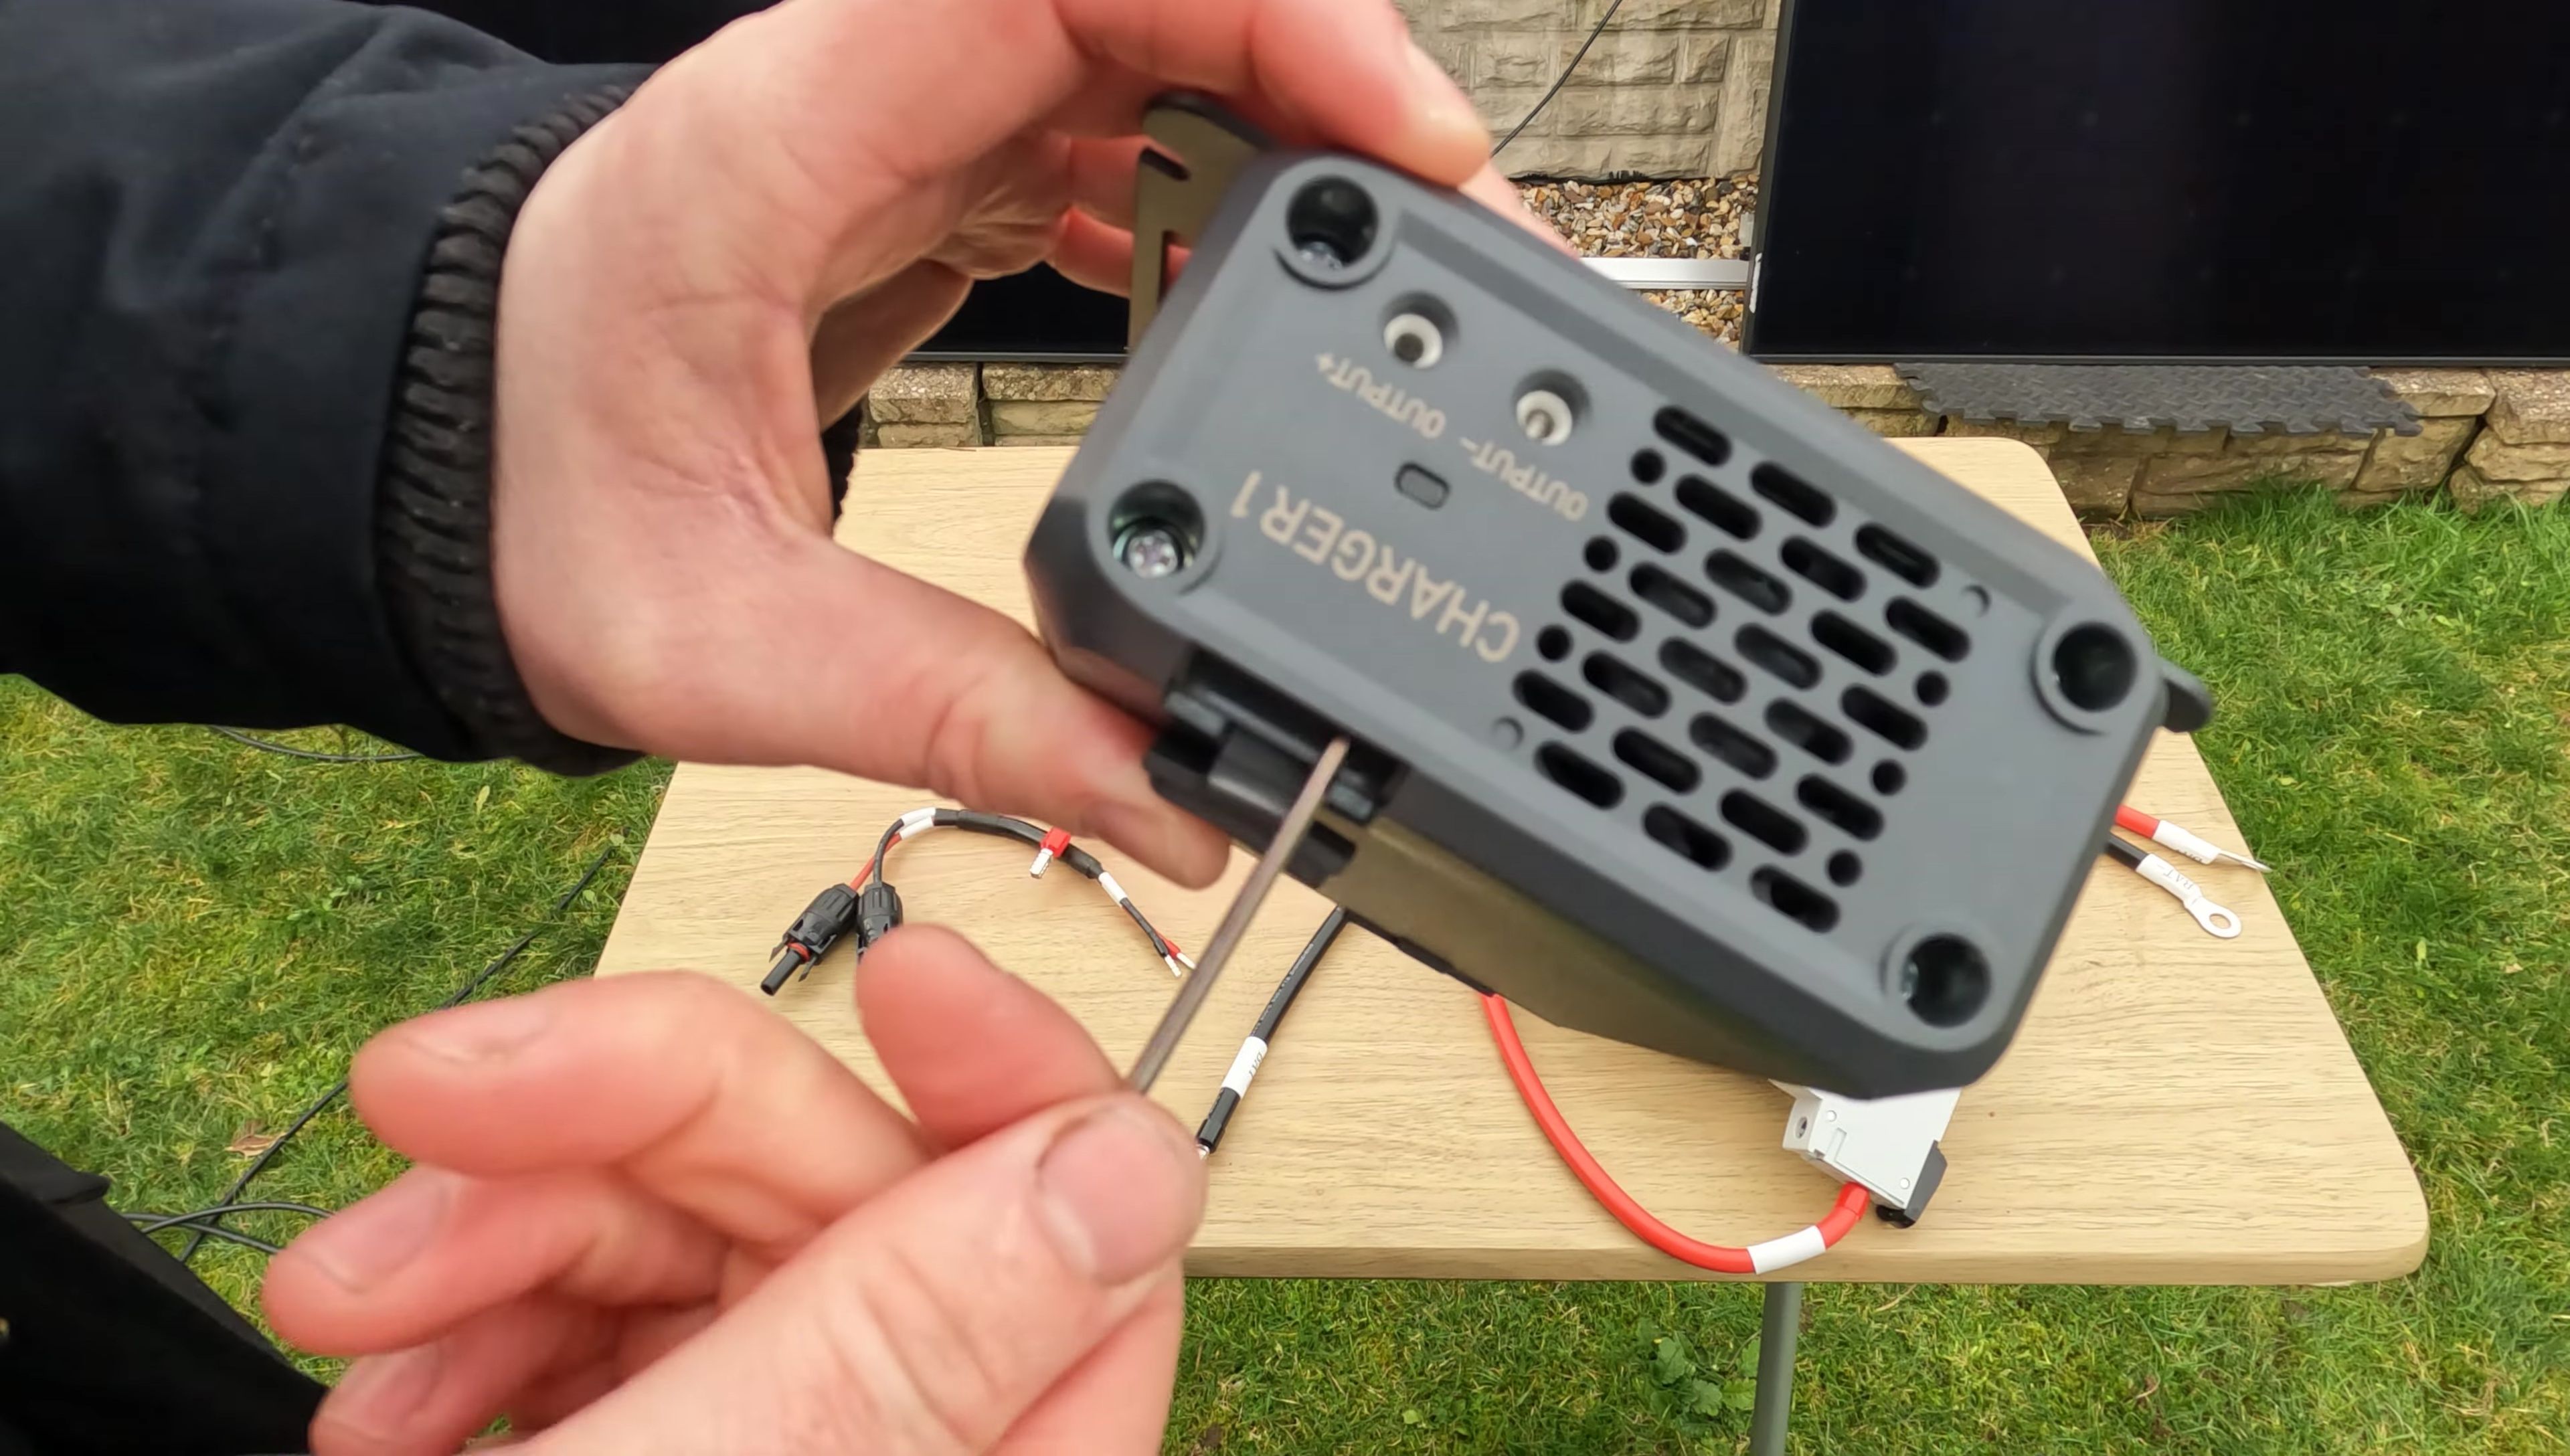
The installation begins with accessing the MC4 connectors on the Bluetti AC200P. These are located on the top of the unit and require removing the top cover. Once open, the MC4 adapter is installed into the smaller hole, and the larger hole is used for wiring. Secure the connections with the provided Allen key.
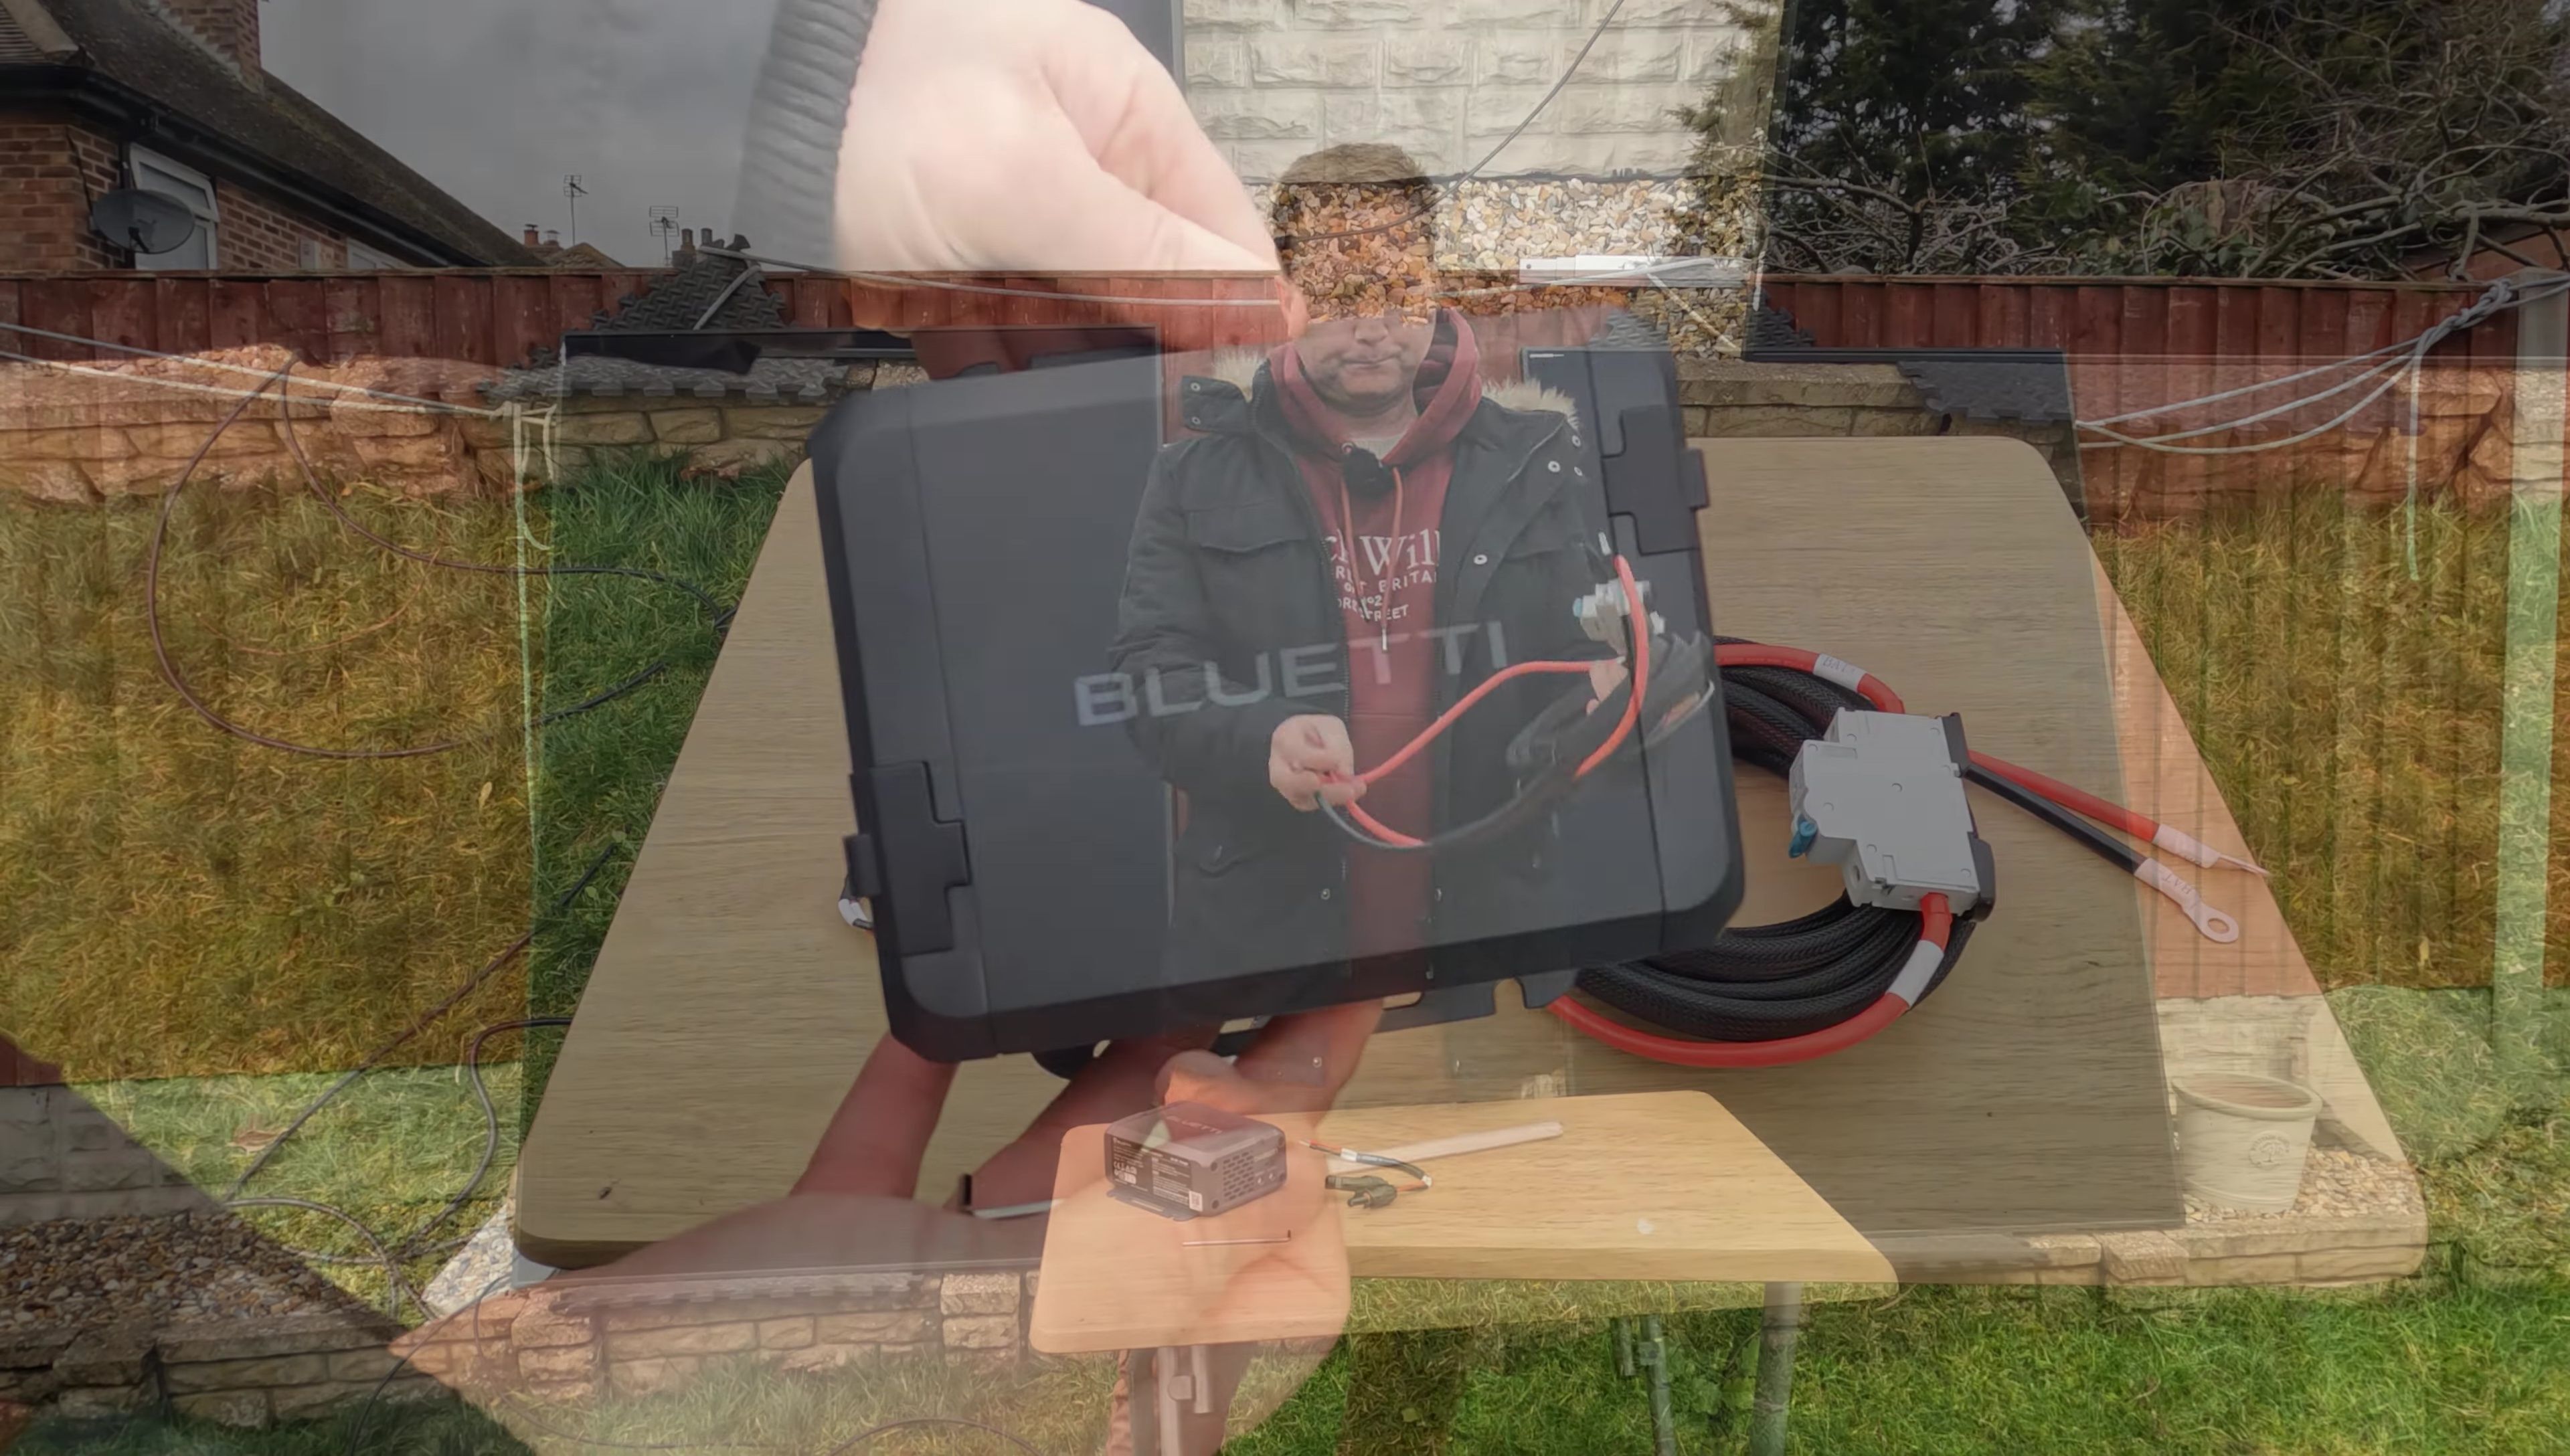
The red cable connects to the positive terminal and the black cable to the negative terminal. I tested the connection before fully integrating it into the vehicle's electrical system to ensure functionality.
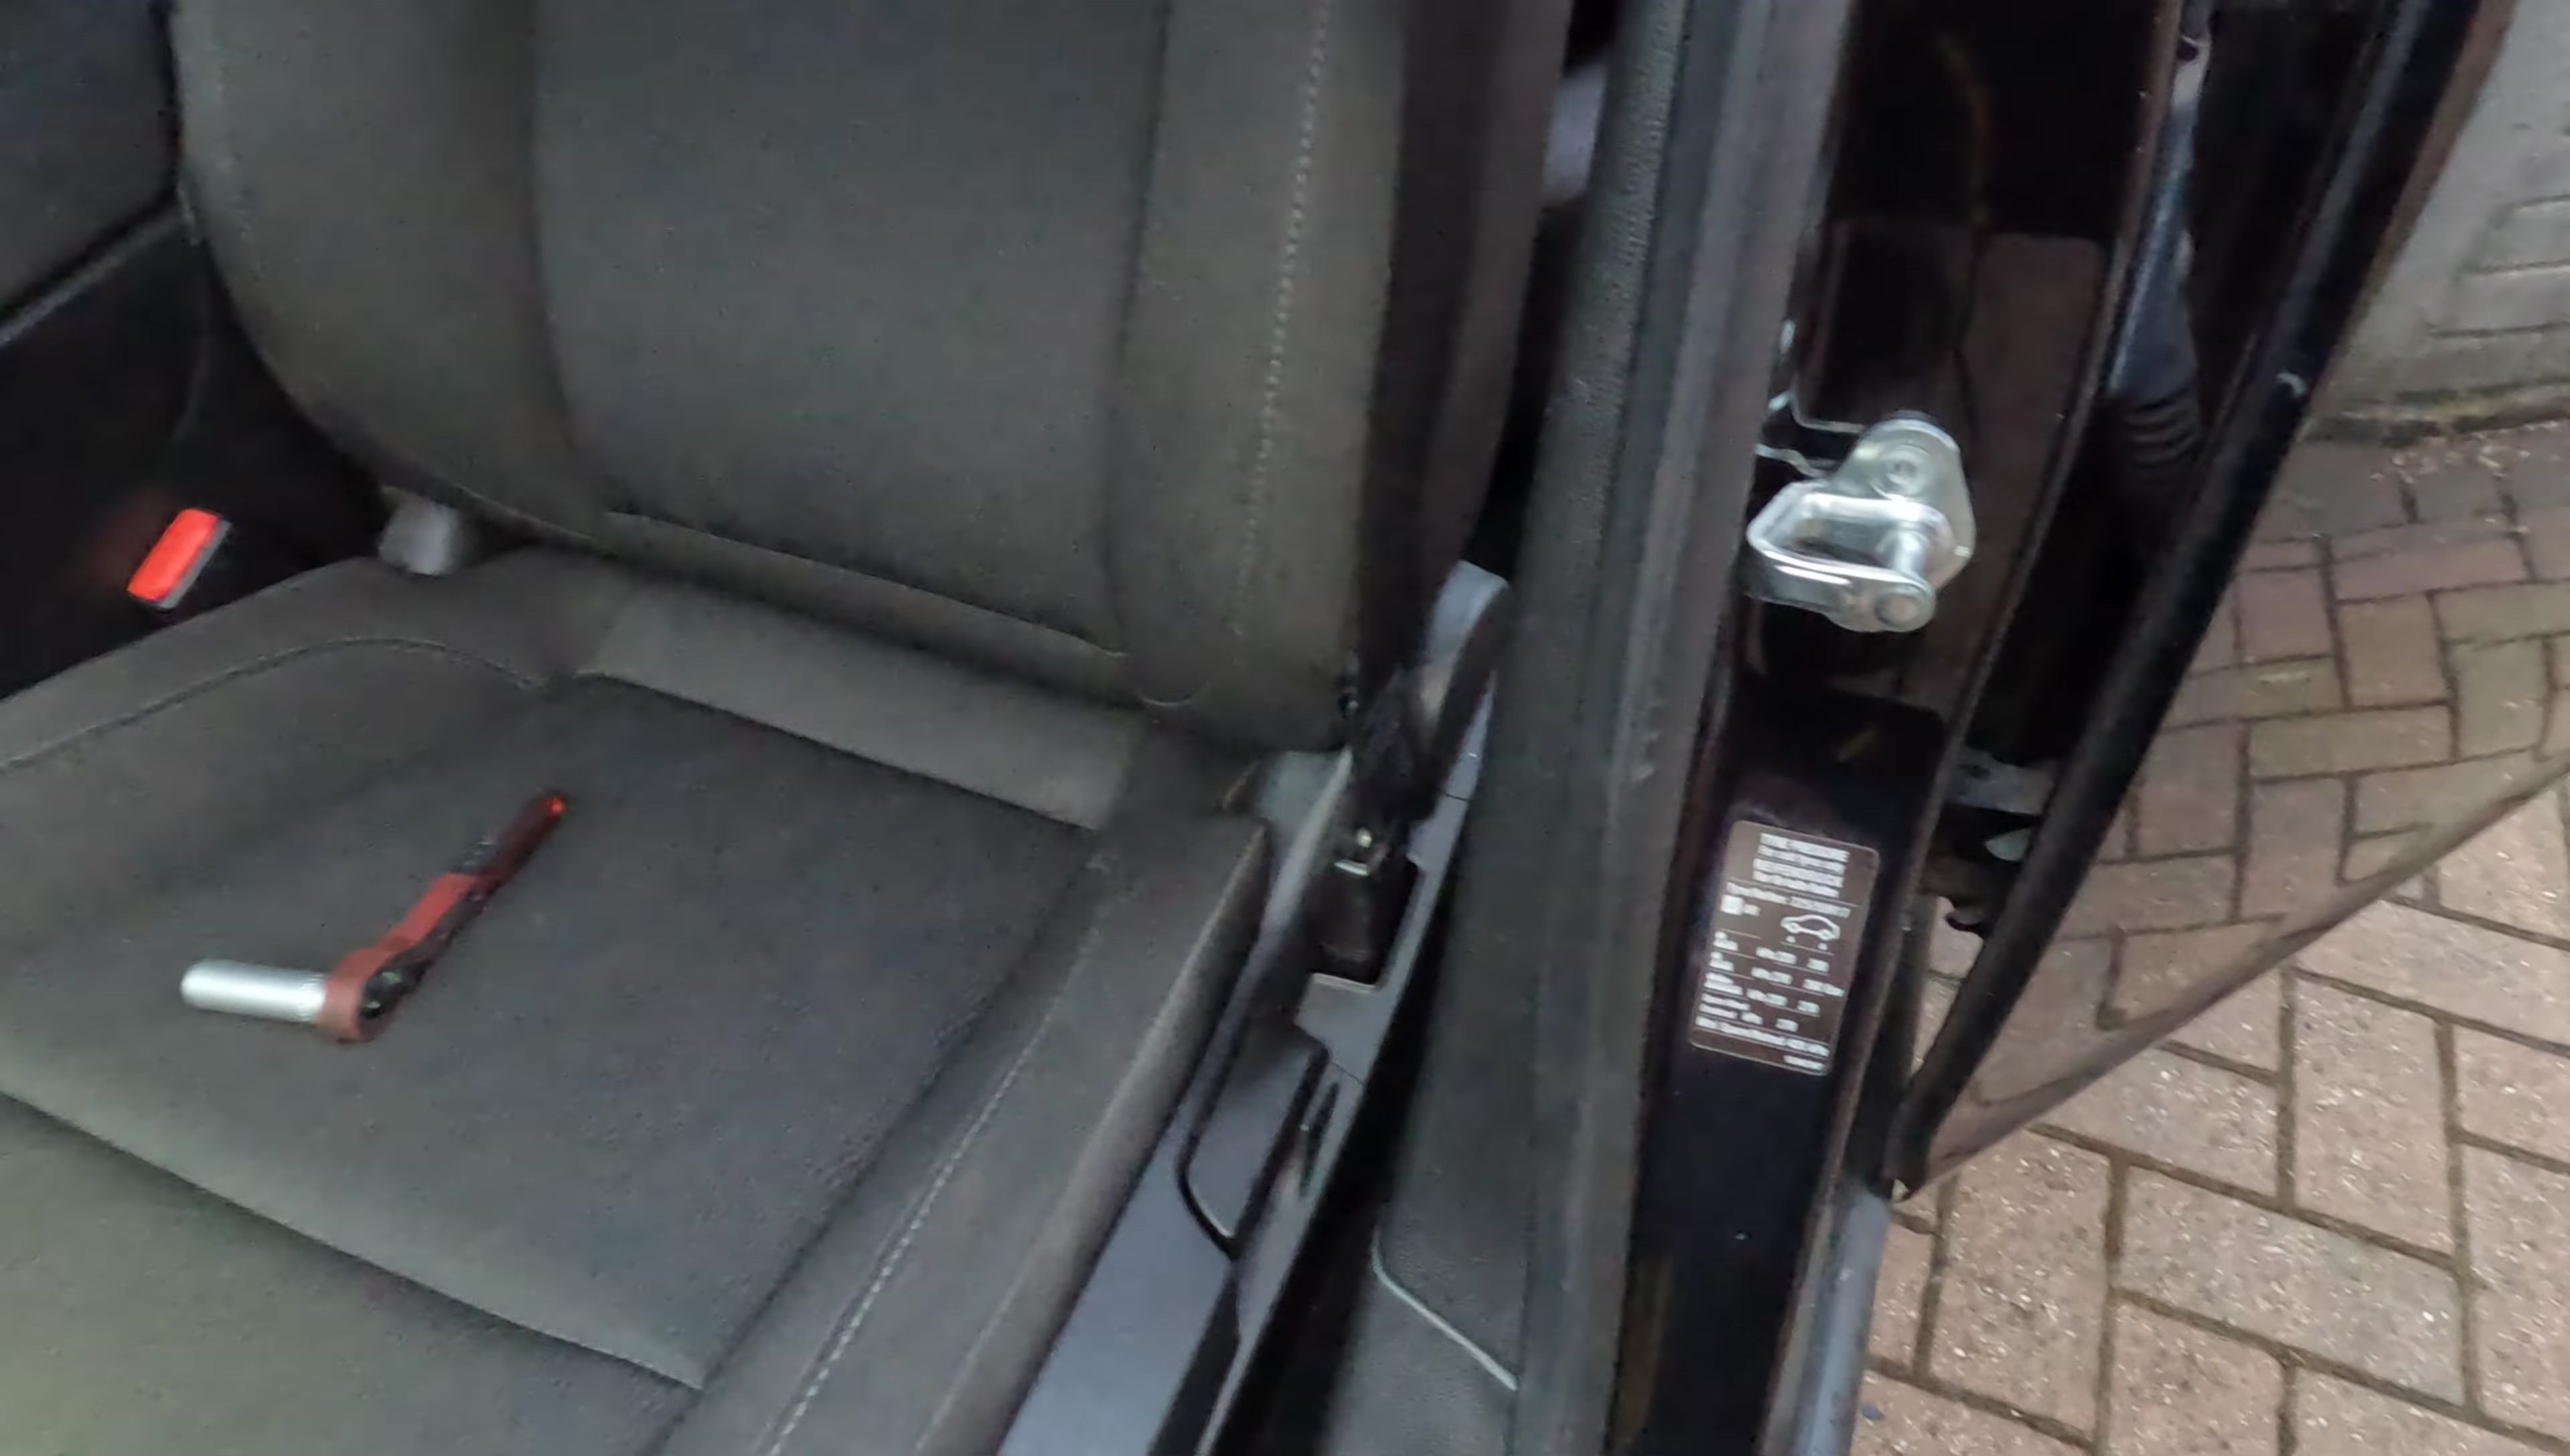
Vehicle Integration: Wiring and Connections
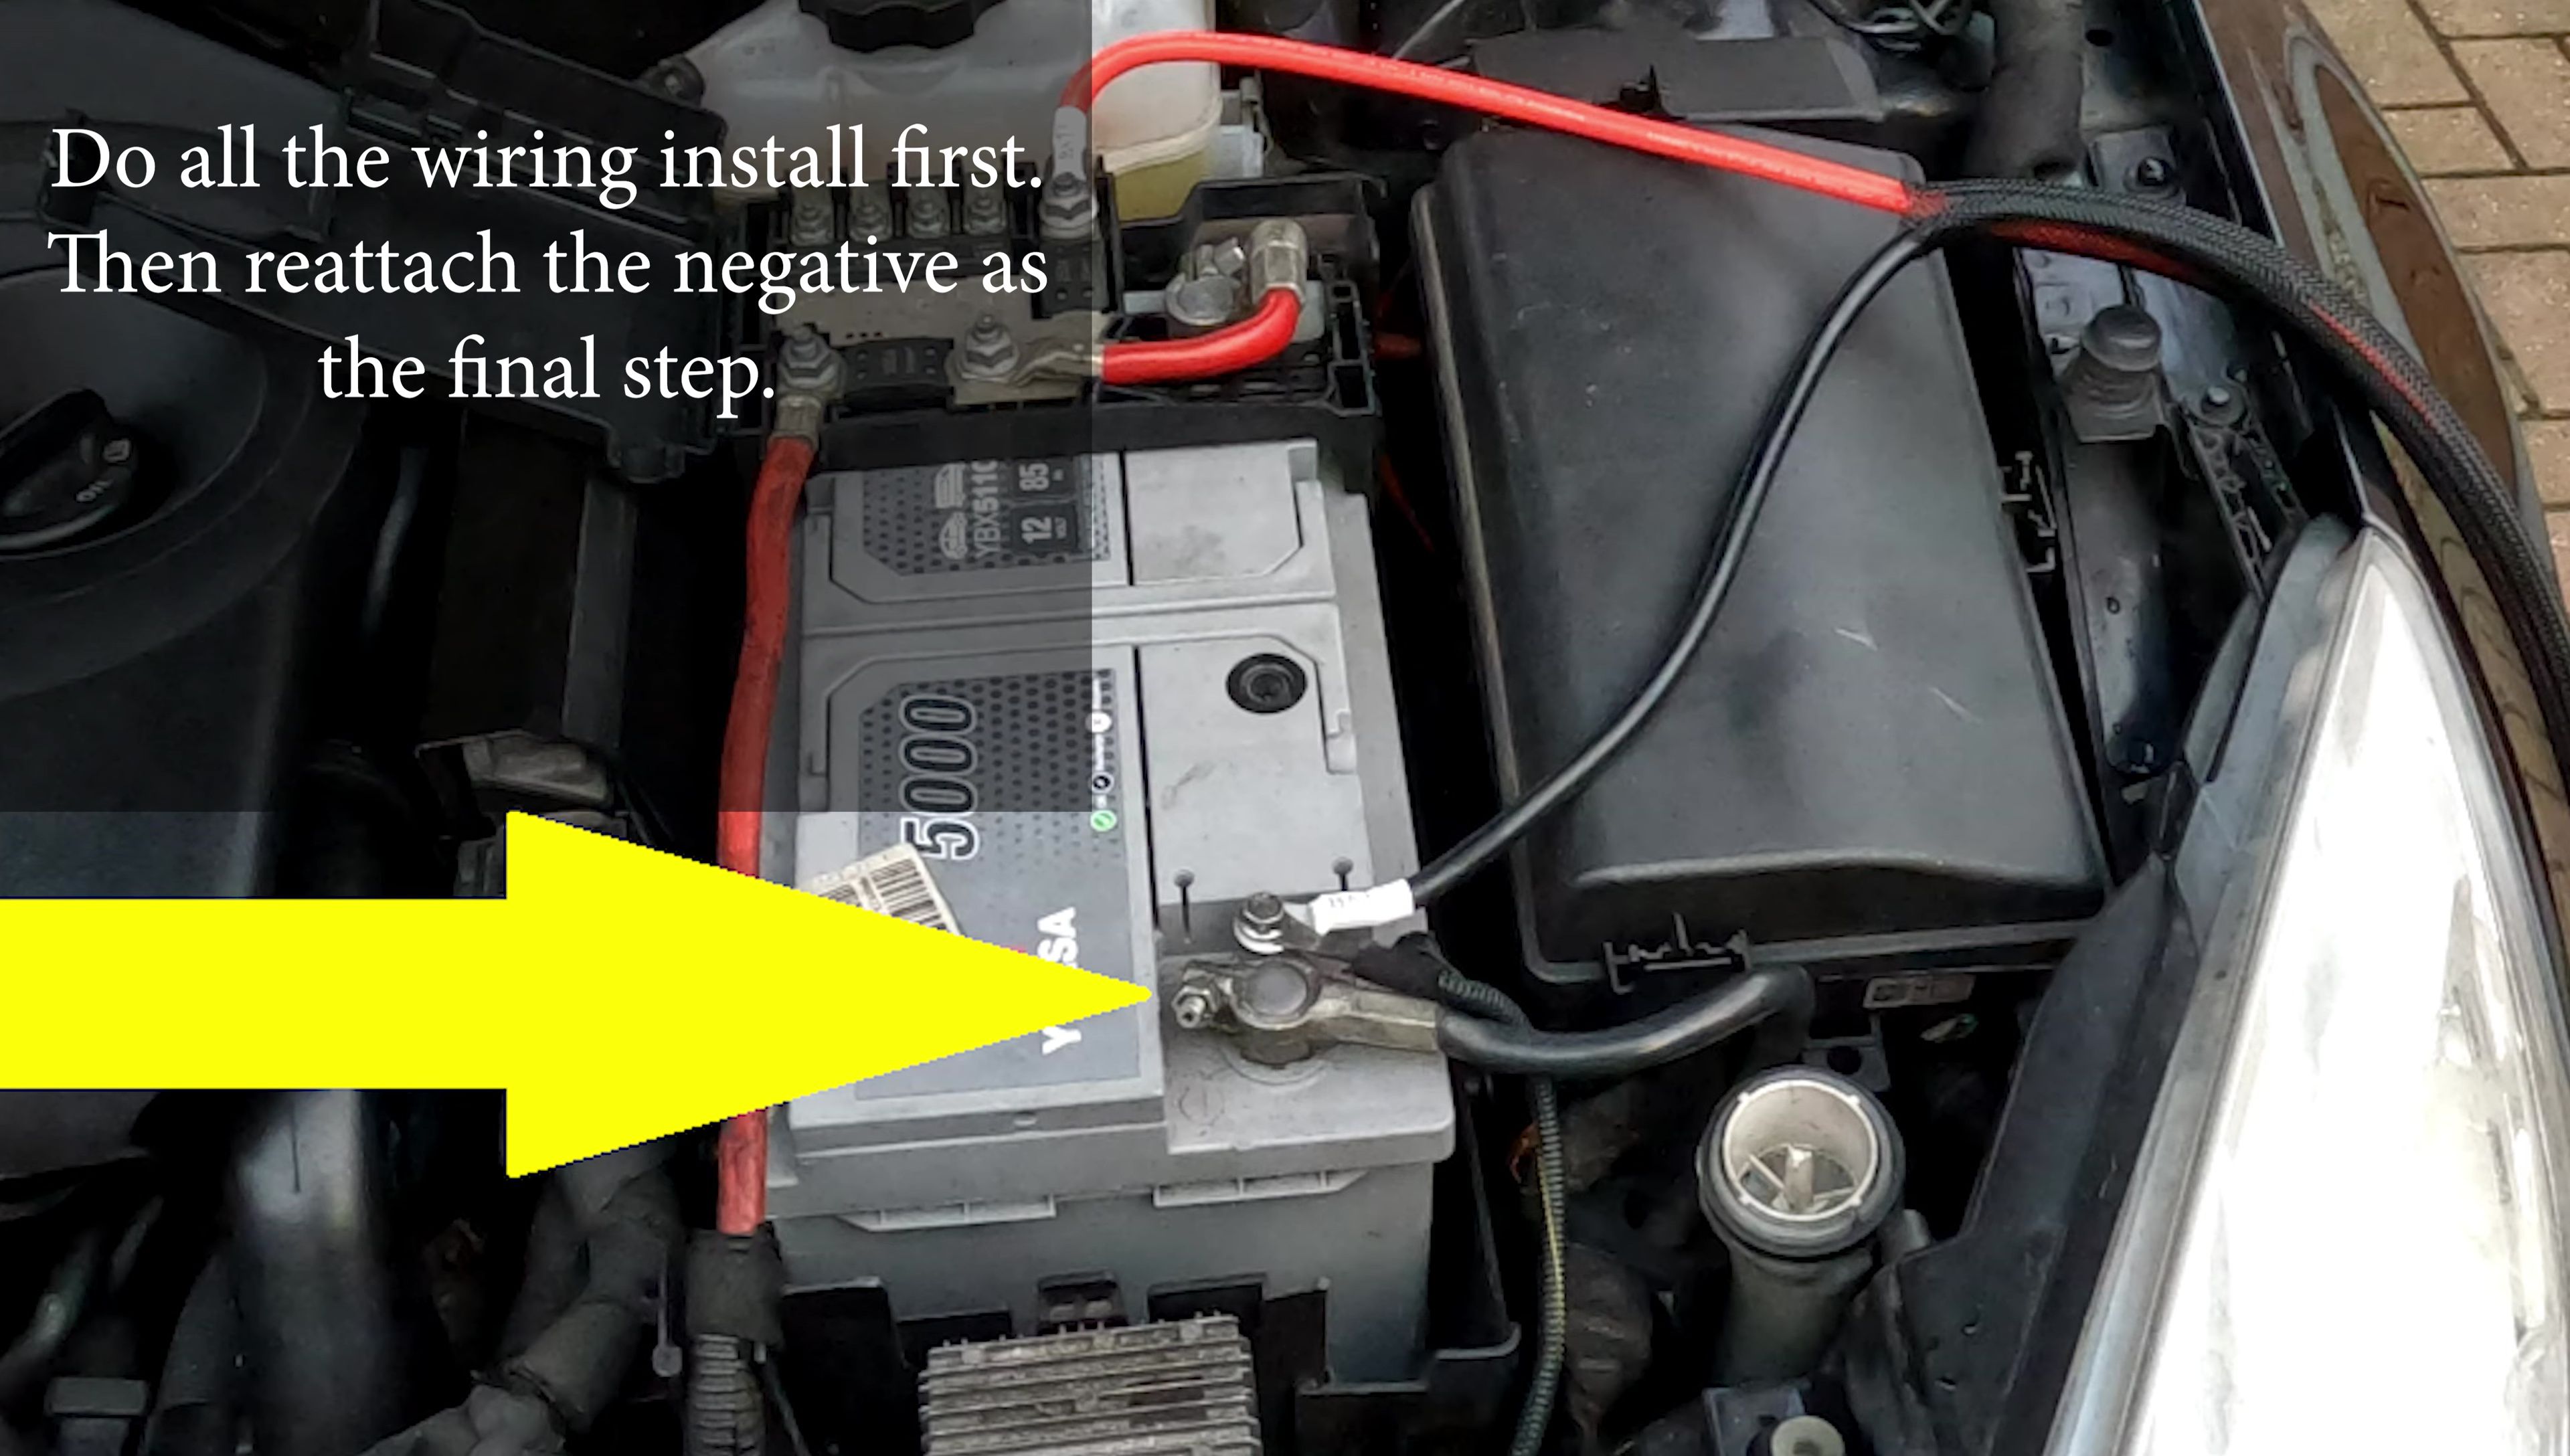
The next step involves connecting the charger to the car's battery. Remember to always disconnect the negative battery terminal before starting any electrical work. I used a 10mm socket to remove the terminal and attached a new cable to a spare stud on the lug.
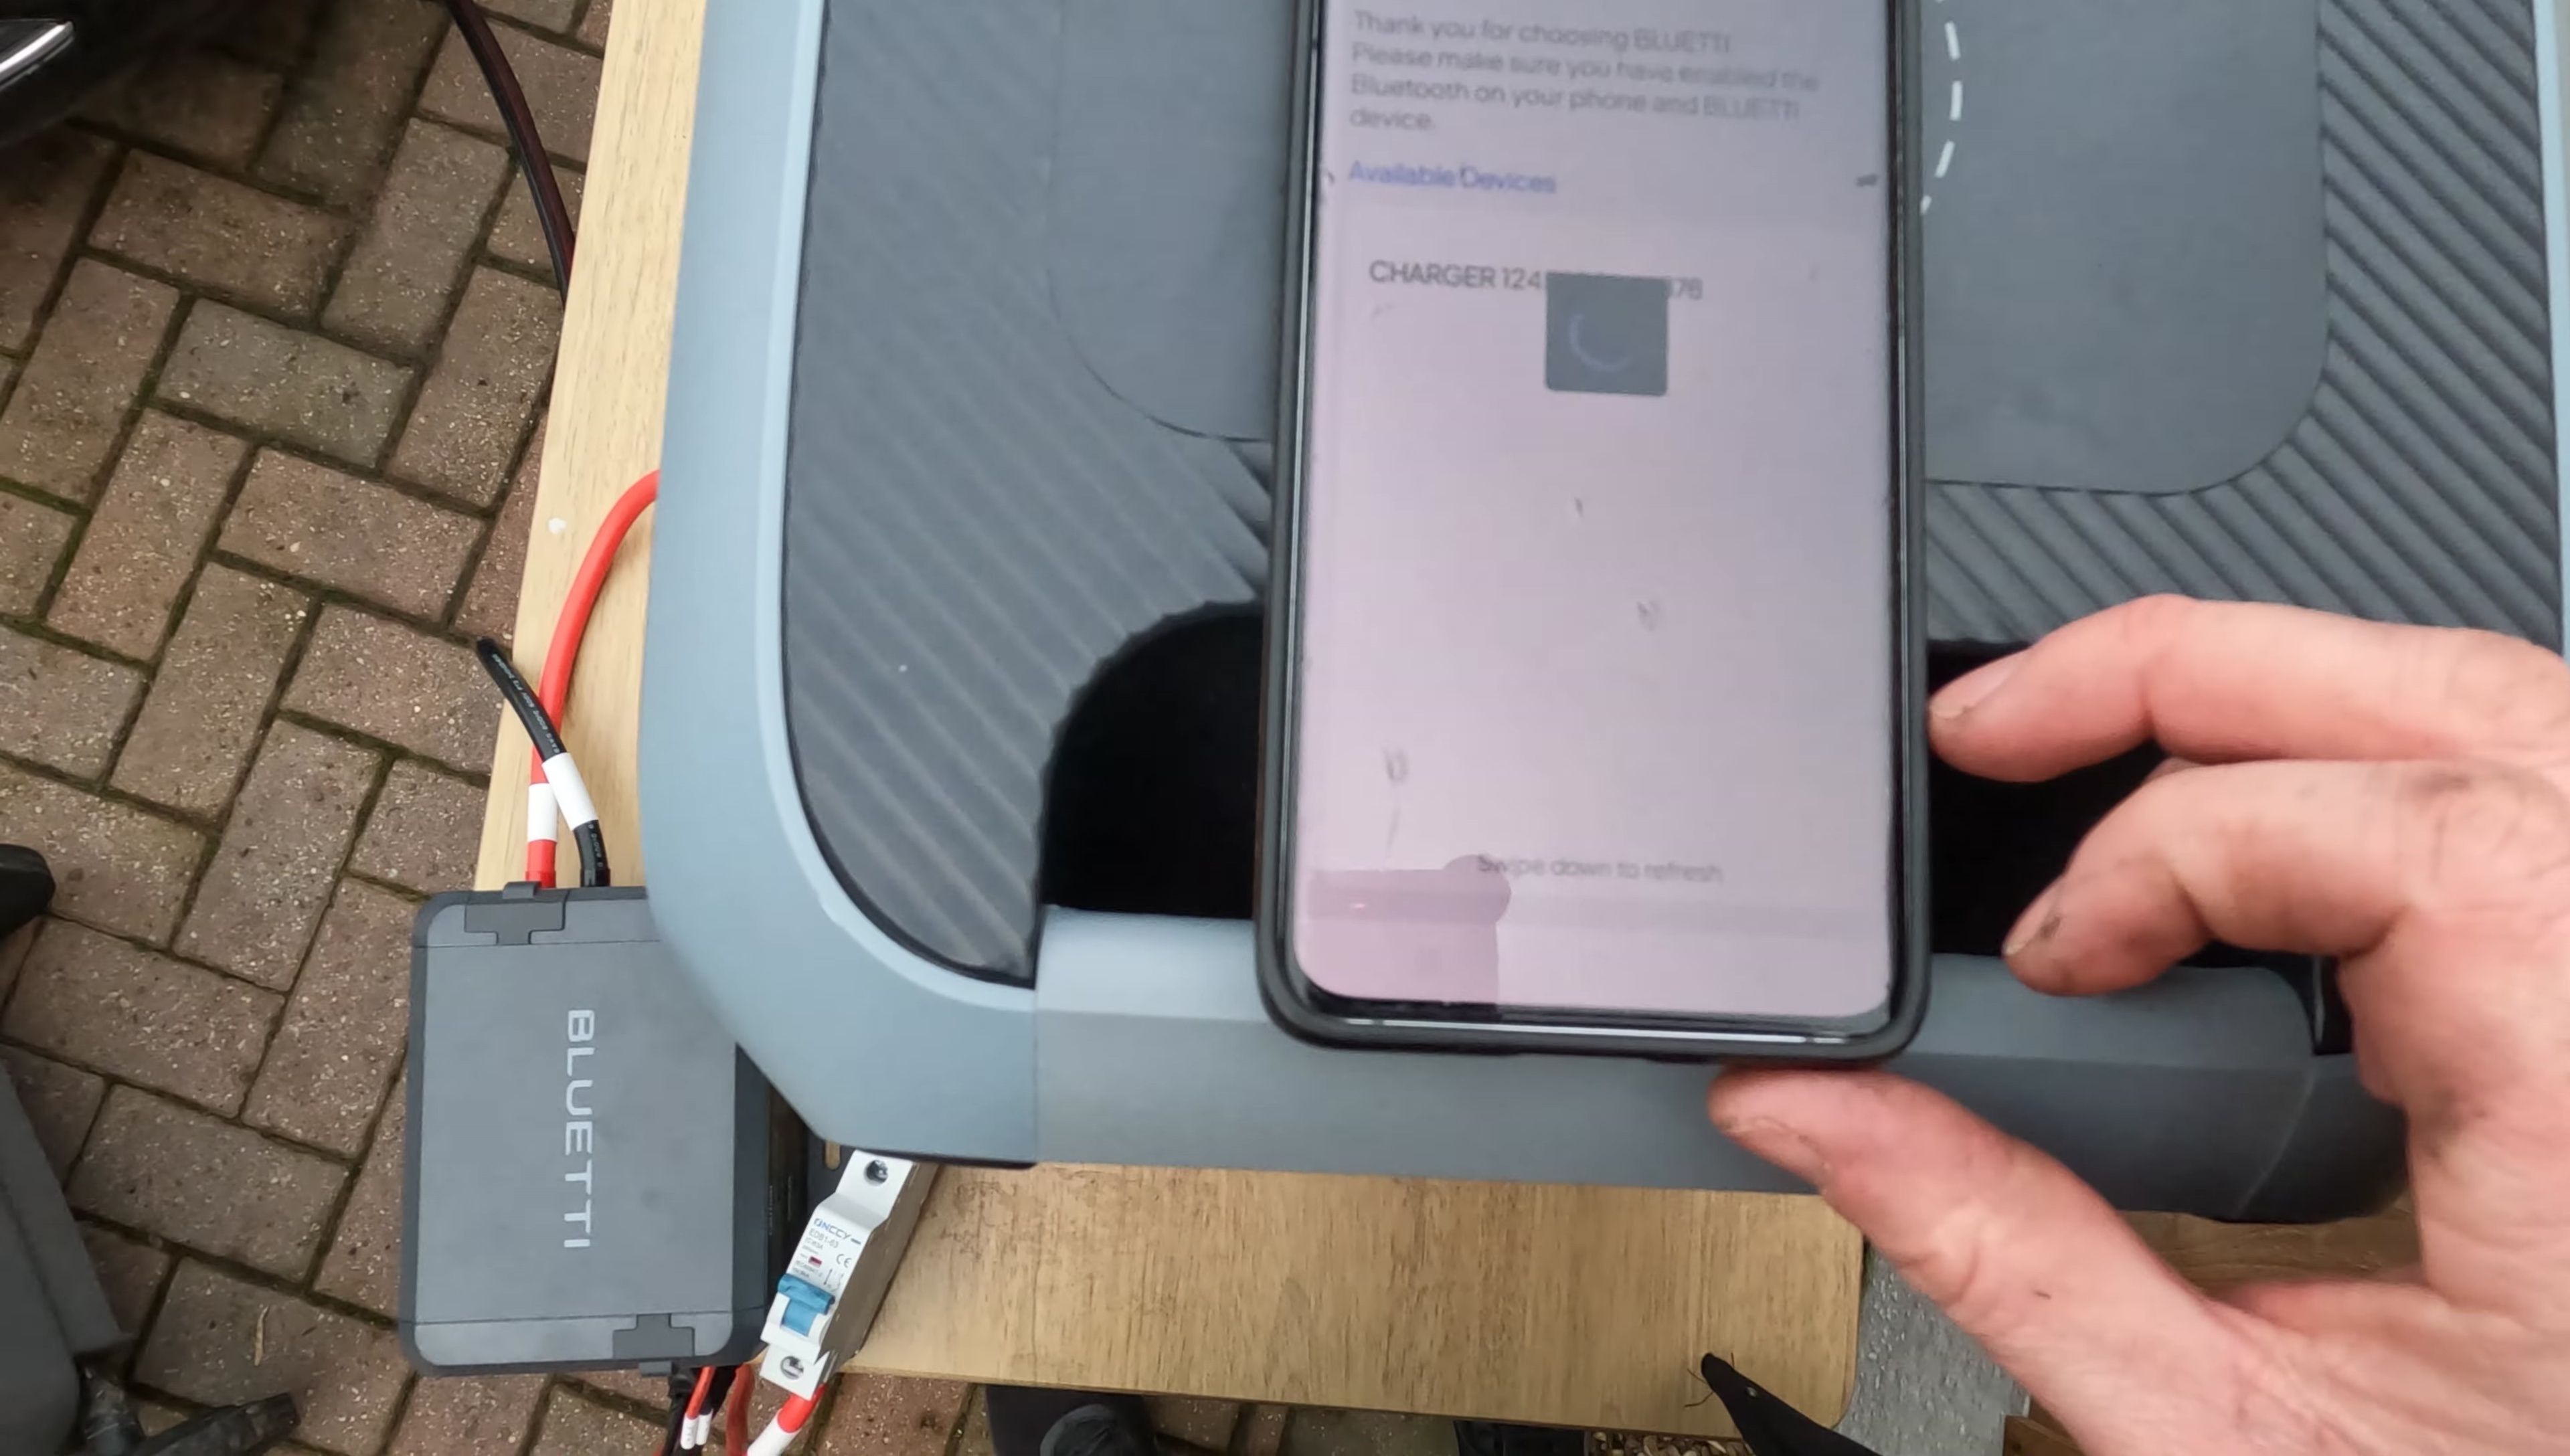
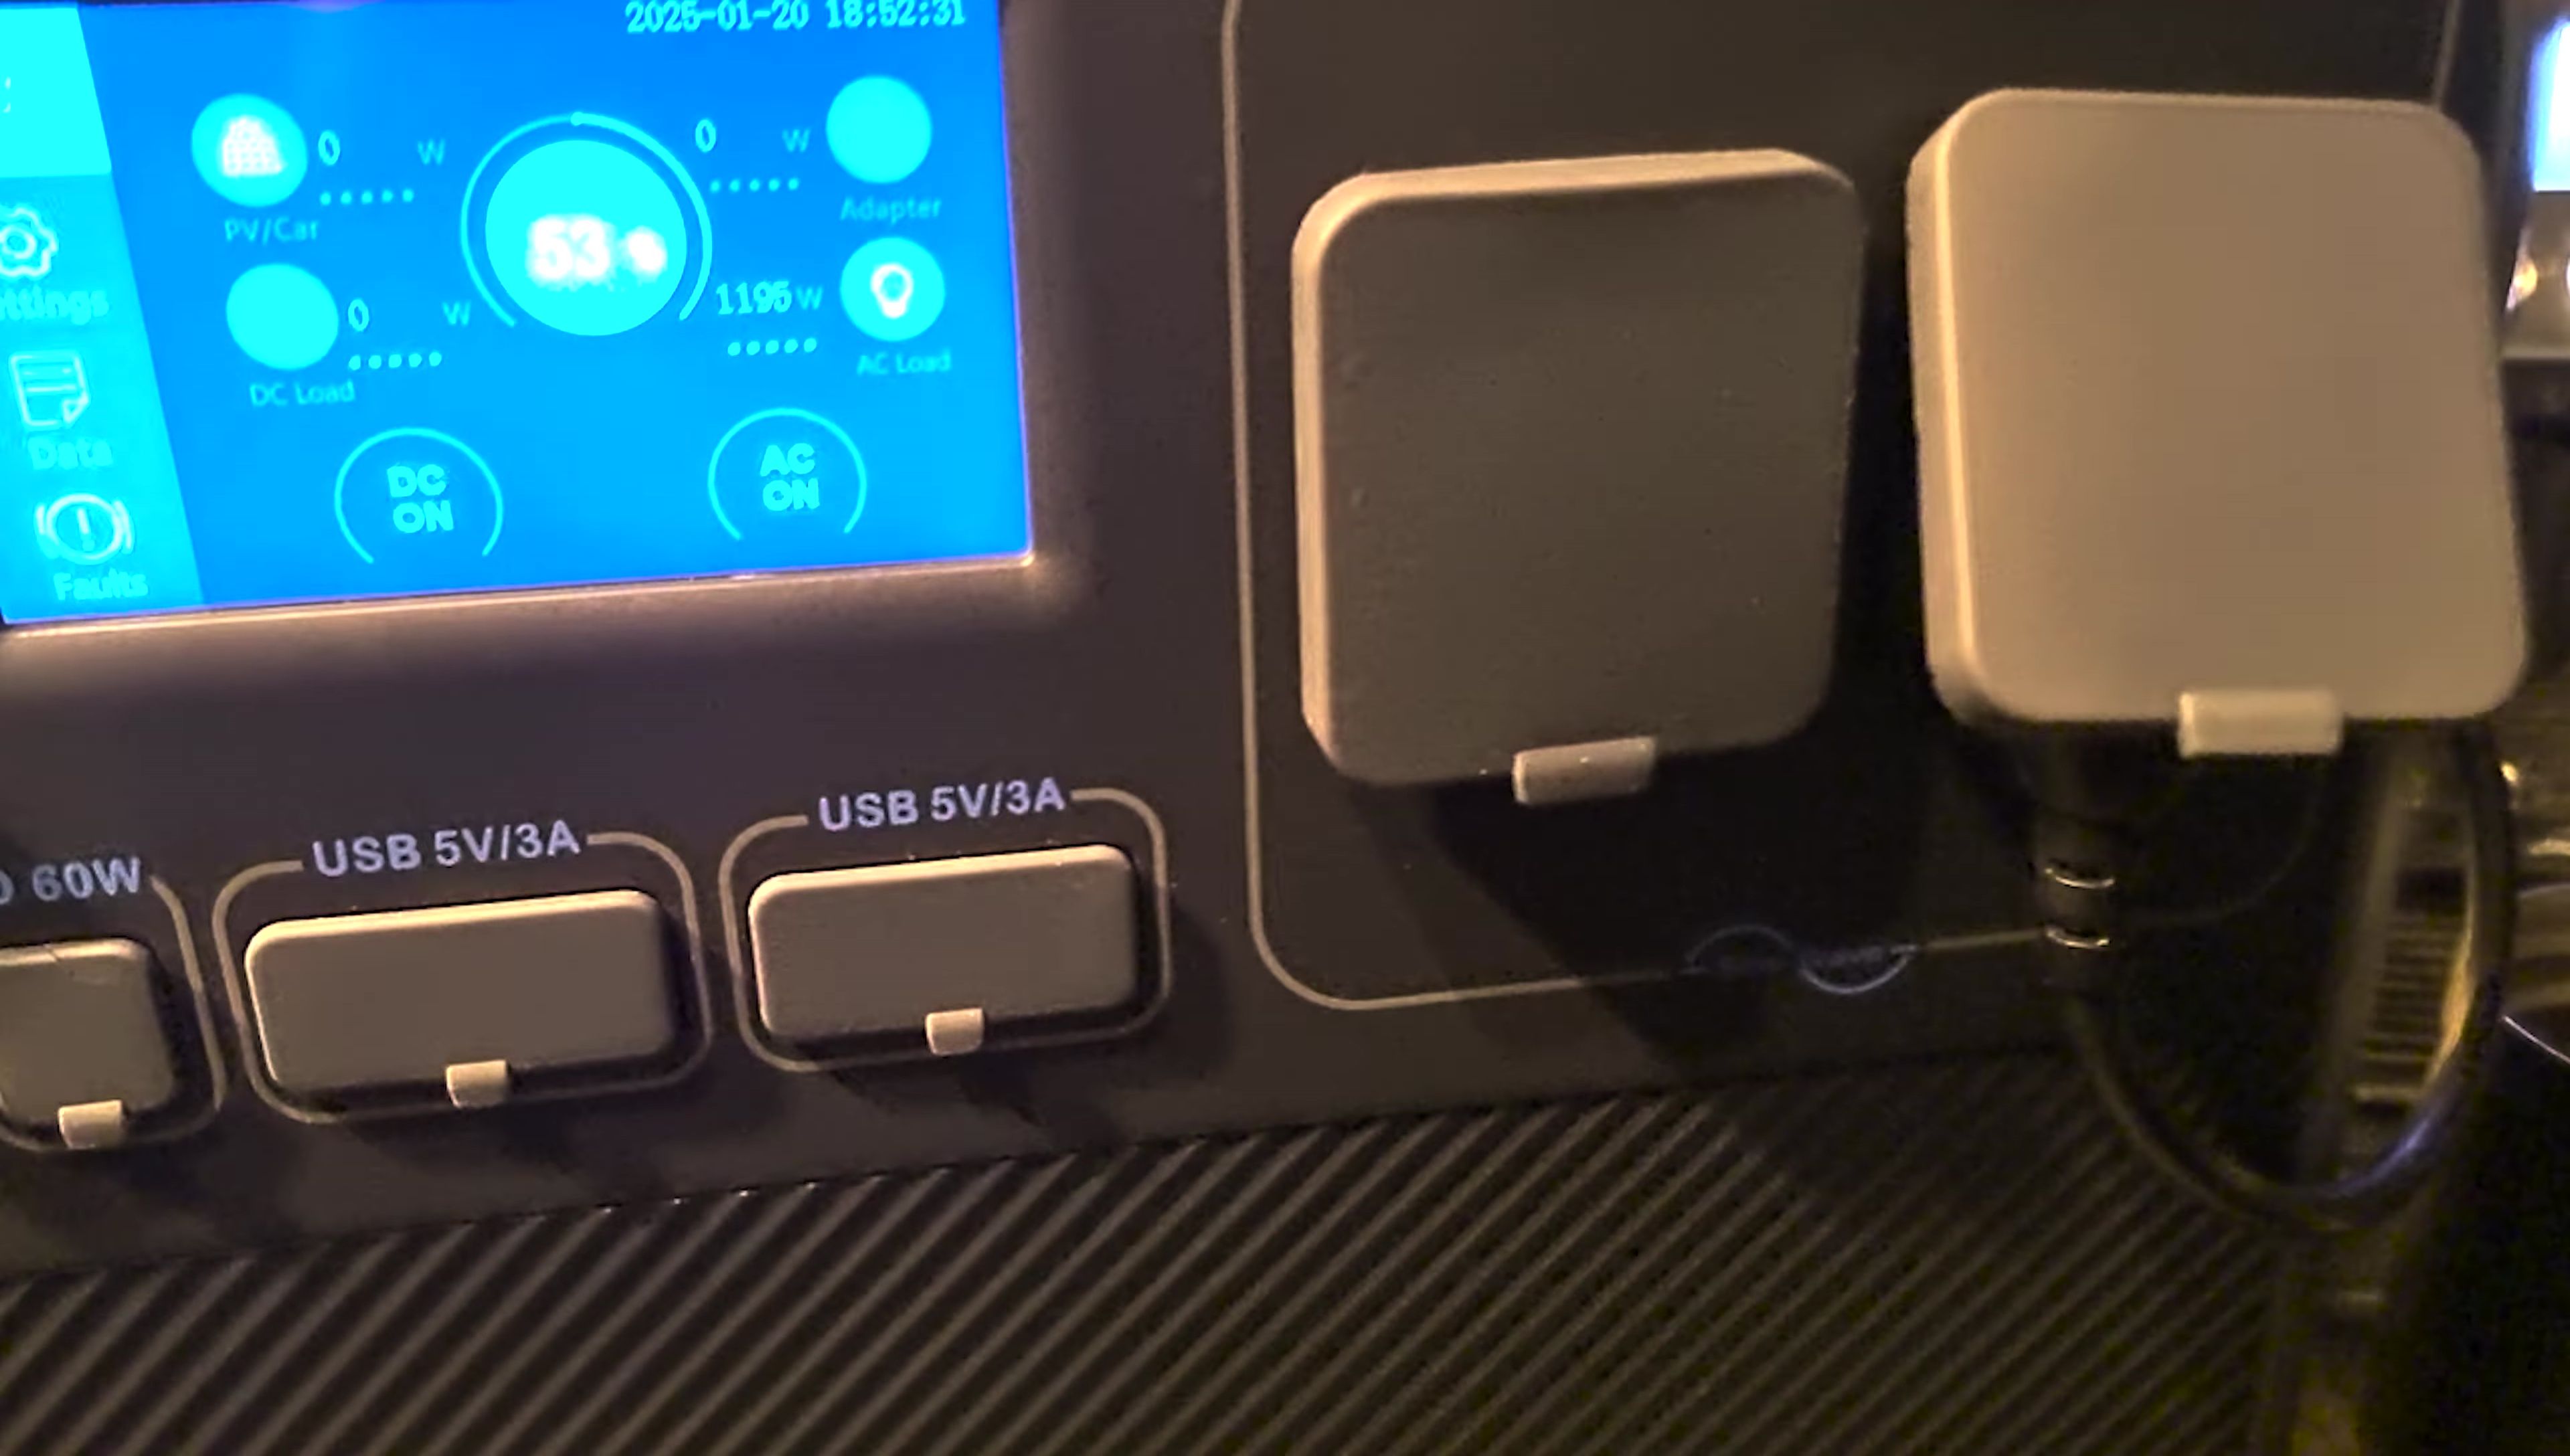
After connecting the positive terminal, the Bluetti Charger 1 is connected to the app and configured. I followed the onscreen instructions to select the correct model (AC200P) and adjust the voltage. Once set, it is ready to charge
Routing the Cables and Securing the Charger 1
Routing the cables from the engine bay to the cabin required finding a suitable conduit. I chose a path under the glove box, removing the glove box for easier access. The ring terminals were pushed through a rubber seal from the cabin to the engine bay.

I secured the cables using cable ties, ensuring they are protected and out of the way of moving parts. The entire process involved careful consideration of cable management to prevent damage and maintain a neat installation.
Final Assembly and Real-World Testing
With the wiring complete, the negative terminal was reconnected. The Bluetti Charger 1 was switched on, and the car engine started to begin charging. The device then started charging at 566W.
A real-world test during a 2-hour drive showed impressive results. Starting at 53%, the power station reached 100% halfway through the journey, demonstrating the Charger 1's effectiveness in real-world driving conditions.
Solar Panel Performance and Conclusion
While the solar panels provided some charging, the performance was far below expectations. Only 34W was generated from the 860W potential in winter conditions. This highlights the limitations of solar charging in less-than-ideal weather situations.
Overall, the Bluetti Charger 1 significantly improves charging efficiency for Bluetti power stations, particularly during vehicle travel. While solar panel performance was disappointing, the Charger 1's impressive speed makes it a worthwhile investment for power station users seeking a reliable alternative or supplemental charging solution.